Does your Bambu Lab fail? These are the most frequent problems and how to solve them.

This site is supported by its readers, and we may receive commissions if you purchase products through our links, at no additional cost to you. More information..
The printers Bambu Lab have become one of the most sought-after options thanks to their speed, accuracy and ease of use. However, not everything is perfect: many users report different problems Bambu Lab which can range from failures in the first layer, automatic calibration errors, to jams in the AMS (Automatic Material System).
As frustrating as it can be, most of these failures Bambu Lab have a practical solution without the need for advanced technical support. In this article we bring together the most common errors in Bambu Lab and how to solve them step by step to keep you printing without interruptions.
Bambu lab problems in the first layer
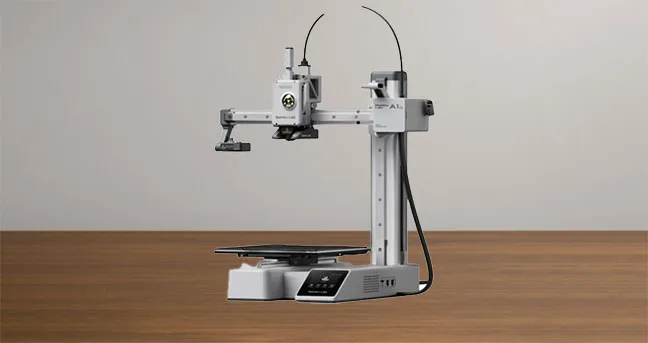
One of the most common problems with Bambu Lab 3D printersespecially in the models A1 and A1 Miniis when the first layer does not adhere properly or has visible irregularities.
This failure may be due to an incorrect setting on the hotend or to loose components in the headThis directly affects the leveling and quality of the print start.
To resolve the first layer problems at Bambu Labis essential to review the adjustment of the hotend and internal screws of the printhead.
Properly tightening these components eliminates unwanted movement and improves the nozzle leveling and consistencyThis results in a much cleaner and more uniform first coat.
After this adjustment, the results are usually immediate and visible on the next impression.
Youtube video: Innovaland 3D
Step by step to solve the problems in the first layer
- Remove the hotend access cover.
Remove the top cover of the printhead to gain access to the internal parts. - Check the movement of the hotend assembly.
Observe for lateral movement or abnormal vibration.
➤ If the hotend moves, it means that it is not firmly adjusted, and that causes variations in the height of the nozzle relative to the bed. - Disassemble the hotend.
Remove the three screws The hotend is then carefully pulled out of the hotend. - Check the four internal screws.
In many cases, these screws loosen slightly with use or vibration.
➤ Tighten them firmly until you are sure there is no play in the parts. - Reassemble the hotend.
Put the hotend back in position, tighten the screws carefully and reinstall the cover. - Make a test print.
At the end, print a test piece to check for improvement in the adhesion and uniformity of the first coat.
Common causes of problems in the first layer
- Hotend with loose screws that generate instability in the head.
- Poor self-leveling due to vibrations or incorrect readings.
- Remains of filament or dirt in the nozzle.
- Dirty print bed or with old adhesive residue.
- Incorrect Z-offset or initial height setting.
Quick tips to avoid future problems
- Check the hotend screws from time to time, especially if you use the printer intensively.
- Clean the nozzle and bed before each print.
- Performs regular automatic calibrations with the printer at operating temperature.
- Use a clean printing surface suitable for the type of material.
- Do not ignore vibrations or slight noises in the spindle: these may be early signs of loosening.
Jamming error in the AMS (Automatic Material System)
One of the most frequent problems of the Bambu Lab is the AMS bottleneckThe AMS, the system that allows the printer to change filament automatically. When this happens The AMS gets stuck and the printer marks a "filament error" or is unable to load/change filament, the machine may stop, mark a filament error or no material change at all. The printing is stopped, there is an unsuccessful color change attempt or the AMS axis rotates idle.
Normally, when this occurs, the filament is tangled, split or stuck inside the module or in the PTFE tube that connects to the hotend.
Youtube video: A3D prints
Step-by-step to solve the AMS jam error
(do this with the printer turned off and with care)
Preparation
- Turn off and disconnect the printer.
- Remove the affected coil and have at hand a pair of tweezers, small screwdriver, a piece of test filament (PETG recommended) and a fine needle.
- Disconnecting the AMS
- Remove the printer connector and external cables according to the manual. Work with the unit disconnected.
- Open the housing
- Loosen the screws and lift the housing to access the ducts and gears. Take pictures if you are going to disassemble parts to remember the order.
- Visually inspect the ducts
- Look for filament debris, broken ends or tangles in the grooves where the thread passes through. Check the PTFE tubing as far as you can see.
- Removing the jammed filament
- If you see a clogged piece, pull with tweezers in the outward direction. If it is very encrusted, insert a piece of petg or a cleaning filament and push/displace to dislodge the blockage (avoid forcing with blows).
- Check motors and gears
- If the filament gets stuck trying to come out, loosen the motor or remove the gear cover to inspect. Clean out any plastic debris or dust and check the gears for broken parts.
- Reassembly and load test
- Set everything up in order, plug in the AMS, manually load a good quality filament and run the load/unload routine from the printer. Verify that the AMS pushes without any strange noises.
- Final test in print
- Make a filament change test or a short print with color change to confirm that the AMS is already working properly.
If it is not solvedDocument the failure, save photos and contact Bambu's official support (or a technical service). Excessive disassembly may void warranty.
Common causes of jamming in the AMS
- Filament entangled in the spoolThe thread snags and does not come out smoothly.
- Broken filament or fragments inside the PTFE tube.
- Incompatible or too flexible filament (TPU) that is crushed or bent in the course of travel.
- Irregular filament diameter (peaks or thicker areas).
- Moisture in the filament which swells it and makes it sticky.
- Excessive reel tension or nearly empty reel that moves poorly.
- Dirty or damaged gears within the AMS.
- Remains of dust or plastic accumulated in ducts.
Quick tips to avoid future traffic jams
- Cut the filament tip at an angle (45°) before loading.
- Use good brand filament and store it in a bag with desiccant.
- Avoid loading TPU or very flexible filaments in the AMS if they are not recommended.
- Perform periodic visual cleaning of the AMS and PTFE tubing.
- Keep cleaning filament (PETG) on hand to push out debris when needed.
Automatic calibration problems (Auto Bed Leveling and Flow Calibration)
Bambu Lab printers perform an automatic calibration of the bed level and extrusion flow before printing. However, some users report that the first layer is uneven, too flattened or does not adhere at allThis ruins the impression from the start.
In other cases, the flow calibration gives incorrect readings, generating underextrusion or excess material.
Youtube video: ImpresoEn3D
Step-by-step troubleshooting of automatic calibration problems
Preparation
- Use a clean bed with no glue or filament residue.
- Make sure the firmware is up to date.
- Restart the calibration process
- From the printer menu, run again the Auto Bed Leveling (ABL) and the Flow Calibration. Often a reboot corrects temporary errors.
- Check bed surface
- Check that the bed sheet is well positioned, free of dust, grease and old adhesive residues. Cleaning with isopropyl alcohol usually solves reading problems.
- Check the sensors
- If the ABL still fails, it may be due to dirt on the sensor or nozzle. Clean the nozzle and hotend tip before calibration.
- Manual fine adjustment (optional)
- Even though the Bambu Lab is automatic, if the first layer is not even, you can manually adjust the Z-height during initial printing using the menu options. This compensates for slight differences that ABL does not correct.
- Check extruder flow
- If the flow calibration gives bad results, try a reliable reference filament. Some poor quality filaments generate unstable readings.
- Upgrade firmware and Bambu Studio
- Some calibration problems are due to bugs already fixed in updates. Check that you have the latest version installed on both the printer and the slicer.
Common causes of automatic calibration failures
- Dirty bed or with glue residues that interfere with the measurement.
- Nozzle with filament residues which affects the height reading.
- Wear or poor contact of the bed plate.
- Calibration sensor misadjusted or dirty.
- Filament accumulated in the shaft bores.
- Firmware out of date with failures in the ABL algorithms.
Quick tips to avoid future problems
- Bed cleaning with isopropyl alcohol for each important impression.
- Update the firmware at least once a month.
- Use replacement blades if the current one shows visible wear.
- Keep the nozzle clean before performing calibration.
- Perform preventive maintenance on the printer.
Adhesion problems in the first layer
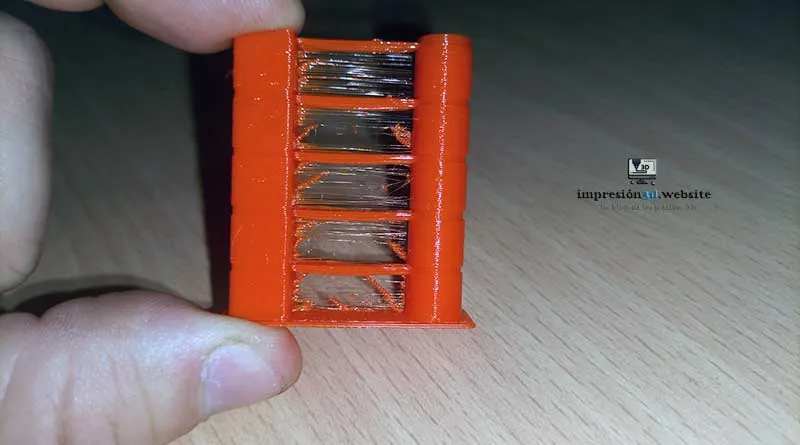
One of the most common problems with Bambu Lab printers is that the first layer does not adhere well to bedding. This causes the part to peel off in the middle of work, generating failed, deformed prints or directly a "spaghetti" of filament.
Youtube video: LayerLab
Step-by-step to solve adhesion problems in the first coat
Preparation
- Have isopropyl alcohol, spatula and, if you use it, your favorite adhesive (glue stick, spray lacquer, Kapton tape, etc.).
- Bed cleaning
- Clean the surface well with isopropyl alcohol. Remains of grease from hands or previous filament are the number one cause of poor adhesion.
- Verify Z-calibration
- Make sure the nozzle is not too high or too low. If Auto Bed Leveling does not correct this, manually adjust the Z-height during the first coat.
- Use auxiliary adhesives
- For difficult filaments (ABS, Nylon, PETG), apply glue stick or spray lacquer. This improves grip and avoids warping.
- Check bed and nozzle temperature
- A common mistake is not preheating enough. Use the recommended temperatures for each filament. A bed that is too cold prevents proper bonding.
- Activate the Brim or Raft on the slicer
- If the part has little contact base, I added a brim or raft at Bambu Studio. This generates a larger surface area and reduces the risk of peeling off.
- Check the printing foil
- If it is worn or scratched, adhesion may fail. Consider replacing it if it no longer grips well even if you clean it.
Common causes of poor adhesion
- Dirty or greasy bedding.
- Incorrect Z-height calibration.
- Low bed temperature for the material used.
- Use of wet filament affecting the first layer.
- Damaged or worn bedding surface.
- Low contact base part design.
Quick tips to avoid future problems
- Clean the bed before each important print.
- Adjust the Z-height manually if you find that the first layer is not even.
- Store the filament in a bag with desiccant to avoid humidity.
- Use brim or raft for tall or low base pieces.
- Always have a glue stick or cheap hairspray at hand: it is often the quickest solution.
Filament sensor error (Filament Runout / Filament Error)
The printers Bambu Lab have a sensor that detects if the filament runs out, is cut or stops advancing. When this system fails, messages such as "Filament Runout" either "Filament Error" even if the coil still has material.
The result is that the printer stops in the middle of the job, or does not recognize that the filament has been loaded, interrupting long print runs.
Youtube video: ImpresoEn3D
Step by step to solve Filament Sensor Error
To resolve a filament sensor error at Bambu Lab, clean the sensor with a pipe cleaner or a piece of filament, check that the wiring is properly connected, verify that the sensor magnet moves freely and without binding, and make sure there are no stuck or deformed filament debris blocking the sensor arm.
- Turn off the printer and disconnect the power cord. This prevents electrical damage while working on the sensor.
- Access the filament sensor. Locate it at the filament entry point, usually near the extruder or AMS.
- Clean the sensor. Use a pipe cleaner, compressed air or a piece of filament to remove dust, plastic debris or moisture.
- Check the wiring. Make sure that the connector is securely fastened and has no looseness or bent pins.
- Check the sensor magnet. Check that it runs freely and without obstructions.
- Check the filament. Make sure it is not swollen from moisture or deformed in the detection area.
- Turn the printer back on and perform a filament load test. If the error persists, consider upgrading the firmware or replacing the sensor.
Common causes of filament sensor error
- Badly cut filament tip that does not activate the sensor correctly.
- Dust, debris or shavings in the sensor channel.
- Special filaments (TPU, silk, metallic) that confuse detection.
- Loose cable or connector of the sensor.
- Firmware out of date with reading errors.
- Defective or misaligned sensor (rare, but possible).
Quick tips to avoid future problems
- Always cut the filament at a 45° angle before loading.
- Periodically clean the sensor with compressed air.
- Avoid loading filaments with dust or moisture residues.
- Have a roll of basic filament for quick tests.
- Keep the firmware up to date and check user forums for compatibility patches.
Strange noises or vibrations in shafts
Bambu Lab 3D printers are renowned for their quality and precision, but in some cases users report strange noises or vibrations in the motion axes. These noises can affect the user experience and sometimes compromise print quality.
Youtube video: MAKER CHARACTER
Step by step to solve strange noises or vibrations in shafts
- Turn off the printer and move the axes manually. Smoothly scrolls the X, Y and Z axis to detect areas of friction or resistance.
- Check the straps. Check that they are not too loose or too tight. Adjust the tension with the adjustment system provided with the Bambu Lab.
- Lubricates the guides and rods. Use lubricant suitable for 3D printers (PTFE or light grease) and apply a thin layer on the linear axes.
- Checks bearings and pulleys. Make sure that the pulleys rotate freely and without play. If you detect damaged bearings, replace them.
- Leveling of the machine. Place the printer on a firm and level surface to reduce external vibrations.
- Check fans. Sometimes the noise comes from a dirty fan or unbalanced fan blades. Clean or replace them if necessary.
- Perform a test print. Check if the noises disappear after adjustments.
Common causes of noise or vibration in shafts
- Loose or over-tightened belts that generate knocks or slides.
- Lack of lubrication in linear guides and rods.
- Worn bearings or pulleys that do not rotate correctly.
- Unbalanced fans that transmit vibrations to the chassis.
- Unstable bearing surface which amplifies the printer noise.
Quick tips to avoid future problems
- Check belt tension every 2 to 3 months.
- Lubricate the linear axes at least every 100 hours of printing.
- Keep the fans free of dust.
- Avoid resting the printer on vibrating tables or soft surfaces.
Problems with the integrated camera
Bambu Lab 3D printers usually include an integrated camera that allows you to monitor your prints in real time from the application or the web. However, there are some occasions when the camera stops transmitting, looks blurry or is not recognized by the system at all.
This can be frustrating when relying on it to monitor the progress of parts.
Youtube video: 3D Rundown
Step-by-step troubleshooting of problems with the integrated camera
To troubleshoot problems with a Bambu Lab's built-in camera, make sure you have a stable Wi-Fi connection, update the firmware, clean the lens, check that the internal cabling is in good condition and reduce network traffic. In most cases, updating the software and improving the connection will resolve the fault.
- Restart the printer and the application. Sometimes a simple reboot reactivates the transmission.
- Verify the Wi-Fi connection. Connect the printer to a stable network, preferably 5 GHz, to improve speed.
- Updates firmware and software. Check that both the printer and the Bambu Studio app are on the latest version.
- Clean the camera lens. Use a microfiber cloth to remove dust or stains.
- Check the internal wiring. If you are experienced, open the compartment and check that the camera cable is secure.
- Reduces network traffic. Prevent other devices from consuming too much bandwidth while using the camera.
- Test from another device. To rule out that the problem is coming from the PC or cell phone and not from the printer.
Common causes of problems with the integrated camera
- Unstable or weak Wi-Fi connectionThis causes transmission outages.
- Firmware out of date printer or the Bambu Studio application.
- Dirty or dust/plastic covered chamberaffecting sharpness.
- Loose internal connection cable or damaged inside the printer.
- Excess load on the local network which limits smooth video transmission.
Quick tips to avoid future problems
- Always keep the printer up to date with the latest firmware version.
- Connect the machine to a stable 5 GHz Wi-Fi network.
- Clean the camera lens regularly to avoid blurred images.
- Use a router with good range if the printer is in a remote room.
Firmware error or failed update
Bambu Lab 3D printers require periodic firmware updates to improve stability and add new features. However, in some cases the update may fail, the printer may crash or display firmware-related error messages.
This causes concern among users, as it may prevent the printer from working properly until the problem is fixed.
Youtube video: Leckiestein
Step by step to fix firmware error or failed update
To resolve a firmware error on a Bambu Lab printer, reboot the machine and software, make sure you have a stable Wi-Fi connection, retry the update from Bambu Studio or with a USB stick, and if the problem persists, perform a factory reset or contact technical support.
- Restart the printer and the application. Sometimes, after a reboot, the pending update resumes without problems.
- Verify the Wi-Fi connection. An unstable signal may interrupt the firmware download. Preferably use a 5 GHz network.
- Rerun the update from Bambu Studio. Try downloading and reinstalling the firmware.
- Upgrade via USB memory stick. Download the official firmware from the Bambu Lab website, put it on a flash drive and connect the memory to the printer.
- Do a factory reset. If the error persists, perform a reset from the printer configuration menu.
- Contact technical support. If the machine gets stuck or does not respond, it is advisable to open a ticket at Bambu Lab's official support.
Common causes of firmware error or failed upgrade
- Unstable Wi-Fi connection during download.
- Power failure while installing firmware.
- Damaged or incomplete update file.
- Use of an incompatible firmware version.
- Printer internal memory failure.
Quick tips to avoid future problems
- Always keep the printer connected to a stable network when upgrading.
- Do not turn off the machine during a firmware upgrade.
- Download updates only from official sources (Bambu Studio or official website).
- Back up your profiles and settings before upgrading.
- Check the release notes to confirm compatibility.
Extrusion defects (Under extrusion / Over extrusion)
One of the problems Bambu Lab most common among users is the defective extrusion, which presents itself in the form of under extrusion (when material is missing in the layers) or over extrusion (when too much material is deposited). These faults directly affect the quality of the printed parts, generating voids, irregular surfaces or excess material build-up.
This type of error is often annoying because even with a good 3D design, the final results can look unprofessional.
Youtube video: The 3D factory
Step-by-step to solve extrusion defects (Under extrusion / Over extrusion)
To troubleshoot extrusion problems on a Bambu Lab printer, check the condition of the nozzle and hotend, calibrate the extruder steps (E-steps), adjust the filament flow in the slicer and make sure to use good quality and properly stored filament.
- Check the nozzle. Check for partial clogging and perform a needle cleaning or cold pull.
- Check the extruder pressure. Adjusts the tension of the gear that pushes the filament to avoid slippage.
- Calibrate the E-steps. Make sure the extruder is delivering exactly the amount of filament indicated.
- Adjusts the flow in the slicer. Corrects the flow rate value by decreasing or increasing it according to the type of error.
- Controls the printing temperature. Too low a temperature can cause under extrusion, while too high a temperature can cause over extrusion and dripping.
- Check the filament. If it is wet, old or of poor quality, it may be the main cause of inconsistency.
- Make a test print. Print a calibration cube to verify if the extrusion is now uniform.
Common causes of extrusion defects
- Nozzle partially or totally clogged.
- Incorrect extruder gear pressure.
- Incorrectly calibrated flow rate setting in the slicer.
- Inadequate printing temperatures.
- Filament in bad condition, wet or of low quality.
Quick tips to avoid future problems
- Clean the nozzle periodically with maintenance techniques (needle or cold pull).
- Use filaments of reliable brands and store them in dry boxes or with desiccant.
- Perform flow and E-steps calibrations every time you change material or extruder.
- Print at the temperature recommended by the filament manufacturer.
- Perform regular calibration tests to ensure uniform extrusion.
Clogged or prematurely worn nozzle
Among the problems Bambu Lab The nozzle is most often reported to be clogged or wearing faster than expected. A nozzle in poor condition directly affects print quality, causing incomplete layers, uneven surfaces and, in severe cases, making it impossible to extrude the filament.
This failure usually occurs due to accumulation of debris, use of abrasive materials or simply lack of preventive maintenance.
Youtube video: A3D prints
Step-by-step solution for clogged or prematurely worn nozzle
To fix a clogged nozzle on a Bambu Lab, perform a needle clean or cold pull, temporarily increase the temperature to release filament debris, and if the damage is evident, replace the nozzle with a new one (preferably hardened steel if using abrasive filaments).
- Increases the temperature of the hotend. Bring the nozzle to a few degrees above the usual filament temperature to try to eject clogged debris.
- Perform a cold pull. Insert a cleaning filament or nylon filament, heat the nozzle and pull the filament cold to drag internal debris.
- Use a cleaning needle. Gently insert a specific needle for nozzles to unclog the orifice.
- Check the condition of the nozzle. Look for signs of wear on the outlet diameter or thread.
- Change the nozzle if necessary. If it is badly worn or damaged, replace it with a new one.
- Opt for reinforced nozzles. If you use filaments such as carbon fiber, wood or metallic, use hardened steel or ruby nozzles to avoid rapid wear.
- Make a test print. After cleaning or changeover, it prints a calibration cube to confirm correct extrusion.
Common causes of clogged nozzle or premature wear
- Accumulation of residues due to prolonged printing.
- Use of abrasive filaments with brass nozzles.
- Incorrect printing temperatures.
- Lack of periodic cleaning of the nozzle.
- Poor filament quality (impurities, humidity, dust).
Quick tips to avoid future problems
- Perform periodic cleaning with cold pull or cleaning filament.
- Always use good quality and properly stored filament.
- Replace brass nozzles with hardened steel if you work with abrasive materials.
- Do not print below the recommended temperature, as it promotes clogging.
- Keep a spare nozzle kit to avoid downtime in your production.
Problems with Wi-Fi connectivity and Bambu Studio
Another of the problems Bambu Lab most frustrating for users are connectivity failures between the printer, Wi-Fi and Bambu Studio software. These errors can result in the printer not linking correctly to the cloud, jobs sent from the PC not arriving, or the machine appearing disconnected even when turned on.
Connectivity is essential to take full advantage of the smart features of Bambu Lab printers, so resolving this flaw is a priority for many users.
Youtube video: Quick and Easy
Step by step to troubleshoot Wi-Fi connectivity and Bambu Studio problems
To troubleshoot connection problems between a Bambu Lab printer and Bambu Studio, check the stability of your Wi-Fi network, preferably use the 5 GHz band, restart the printer and software, update the firmware and check that the printer is correctly linked to your cloud account.
- Restart the printer and Bambu Studio. A quick reboot can re-establish the connection.
- Verify the Wi-Fi network. Make sure the printer is connected to a stable signal, preferably 5 GHz.
- Check the network password. If you changed the Wi-Fi password, reconfigure it in the printer.
- Update the firmware. Download the latest version from the printer menu or Bambu Studio.
- Check the linkage with your account. Log into the Bambu Handy app or Bambu Studio and verify that the printer is correctly associated.
- Disable firewalls or blocking. Some antivirus or routers with advanced filters may block communication with Bambu Lab servers.
- Test with another network. Connect the printer to a mobile hotspot to rule out faults in your home network.
Common causes of Wi-Fi connectivity and Bambu Studio problems
- Weak or unstable Wi-Fi signal.
- Use of the 2.4 GHz band with interference instead of 5 GHz.
- Firmware out of date in the printer.
- Incorrect network configuration or wrong password.
- Temporary failures in Bambu Lab servers.
- Connection blocked by firewalls or misconfigured router.
Quick tips to avoid future problems
- Keep your printer and Bambu Studio always on the latest version available.
- Uses a 5 GHz Wi-Fi network for stability and speed.
- Place the printer close to the router or use signal repeaters if it is in a remote area.
- Periodically check that your printer is linked to your cloud account.
- Temporarily disable firewalls if you detect connection blockages.
Overheating or temperature sensing errors
The Bambu Lab printers have temperature detection systems to ensure safe and accurate printing. However, in some cases there are errors related to the overheating of the hotend or hot bedor failures in the reading of the sensors. These problems Bambu Lab can interrupt a print job mid-job and generate defective parts.
When the machine detects abnormal temperatures or fluctuations, it can display error messages on the screen or stop the process automatically to prevent further damage.
Youtube video: Carlex DIY
Step-by-step troubleshooting for overheating or temperature sensing errors
To resolve the temperature problems in Bambu Lab printersIf the hardware and software are not in good working order, it is important to check both the hardware and the software:
- Restart the printerSometimes a reset resets the sensor readings.
- Check the thermistorMake sure it is properly connected and in good condition, as it is responsible for measuring the temperature.
- Check the heating cartridgeIf it is worn or faulty, it could be causing fluctuations in heating.
- Clean the heating blockFilament debris or dirt can affect heat dissipation.
- Update firmware: older versions may have bugs in the temperature calibration.
- Check internal ventilationMake sure that the fans are working properly and are not obstructed.
- Test with another filamentSome materials require extreme temperatures and may generate unstable readings.
Common causes of overheating or temperature sensing errors
- Thermistor loose, damaged or incorrectly positioned in the hotend.
- Worn or defective heating cartridge.
- Clogged or faulty fans, reducing cooling.
- Outdated firmware that generates erroneous temperature readings.
- Accumulation of burnt filament residues in the heating block.
Quick tips to avoid future problems
- Performs periodic maintenance on the hotend and hot bed.
- Replace the thermistor and heating cartridge at the first sign of wear.
- Always keep the firmware of your Bambu Lab printer up to date.
- Avoid printing in extreme temperature environments.
- Make sure fans and heatsinks are always clean and working.
Layer Shift errors (layer shifting)
One of the problems Bambu Lab most frustrating is the Layer ShiftThis error occurs when, during printing, the layers are no longer aligned correctly. This error occurs when, during printing, the layers are no longer aligned correctly and the part is "shifted" to one side. The result is deformed and unusable objects, which means loss of time and material.
He Layer Shift on Bambu Lab printers is usually associated with mechanical failures, vibrations, belt problems or errors in the firmware communication with the motors. Although this may appear to be a serious fault, in most cases it can be solved with simple adjustments and good preventive maintenance.
Youtube video: MihaiDesigns
Step by step to fix Layer Shift errors
- Restart the printout and observe the pattern of the failure.If the error always occurs at the same height, it may be a mechanical problem.
- Check the X and Y axis belts.Make sure they are neither loose nor too tight. Incorrect tension causes displacement.
- Verify the condition of the rollers and linear guidesDirt or dry grease accumulation can block movement.
- Lubricates shafts and guides3D printer specific lubricants are used to improve sliding.
- Check tightness of pulleysIf the screws are loose, the motors will not transmit the movement correctly.
- Reduces printing speedOn large parts or parts with a lot of detail, lowering the speed can prevent vibrations.
- Check the table or surface where the printer is located.If it vibrates easily, place the machine on a firm and stable base.
- Update the printer firmwareSome cases of Layer Shift in Bambu Lab are due to software bugs that have already been fixed in more recent versions.
Common causes of Layer Shift errors in Bambu Lab printers
- Loose, poorly tensioned or worn belts.
- Loose pulleys on motors.
- Dirty or poorly lubricated linear guides.
- Excessive vibrations on the work table.
- Print speeds too high for the part.
- Outdated firmware with motor synchronization failures.
Quick tips to avoid future problems
- Periodically check the tension of the belts.
- Keep the printer guides and shafts lubricated and clean.
- Prints at an appropriate speed according to the type of part and material.
- Place the printer on a stable base to reduce vibrations.
- Always update the firmware of your Bambu Lab to ensure better control of the motors.
Conclusion: mastering your Bambu Lab is a matter of practice and maintenance.
The problems in Bambu Lab printers may seem frustrating at first, but most have simple solutions if approached with method and patience. From a jam in the AMS to poor adhesion on the first coat, almost all common errors stem from calibration adjustments, preventive maintenance or small checks that we can do at home.
Learning to recognize the symptoms, understand the causes and apply practical solutions will make you a more independent and confident user. In addition, keeping your Bambu Lab clean, updated and calibrated will extend its life and improve the quality of every print.
Final tip: save this article in your favorites and review it whenever you notice strange behavior in your printer. It can save you hours of trial and error.
Did you have any other problem with your Bambu Lab that we didn't mention? Tell us in the comments and let's help other users in the community.
If you would like to receive more 3D printing guides, tutorials and tips and tricks, register for free at 3dprinting.website and join our community.


Interesting
Interesting topic