How to add a printer in PrusaSlicer
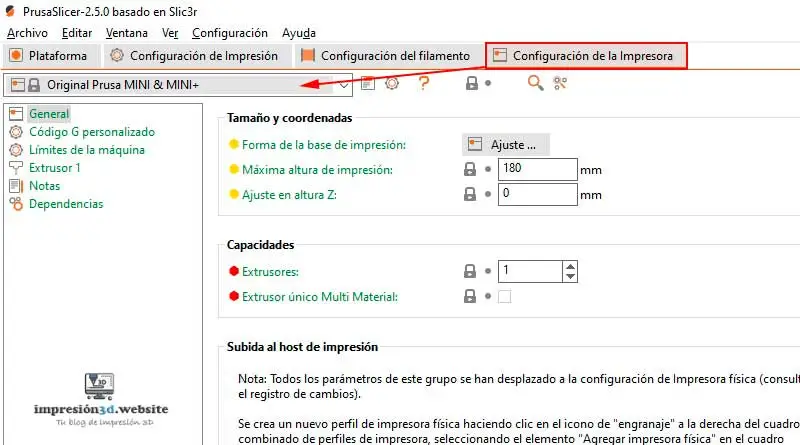
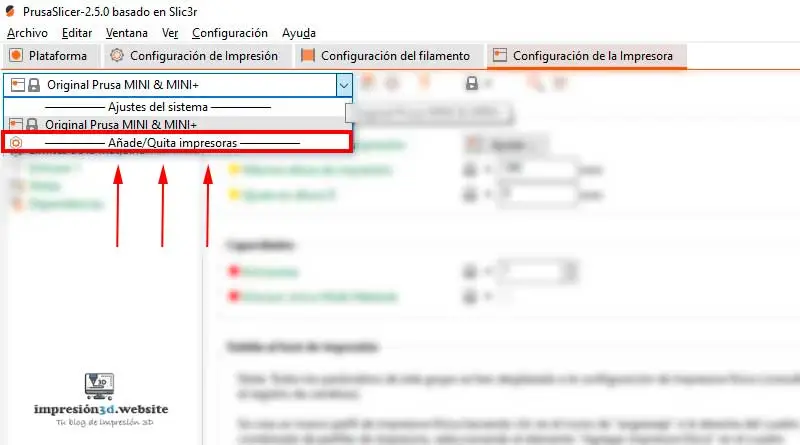
To add a printer in PrusaSlicer, go to the «Printer Settings» tab, open the «System Settings» window for the default printer, and then click «Add/Remove Printers.».
To add a 3D printer in PrusaSlicer, follow the steps below:
1. Open PrusaSlicer on your computer.
If you don't have PrusaSlicer installed on your computer yet, you can check out this post «PrusaSlicer: The laminator from Prusa Research»
2. Go to the «Printer Settings» tab»
3. Open the «System Settings» window»
And then click on «Add/Remove printers«
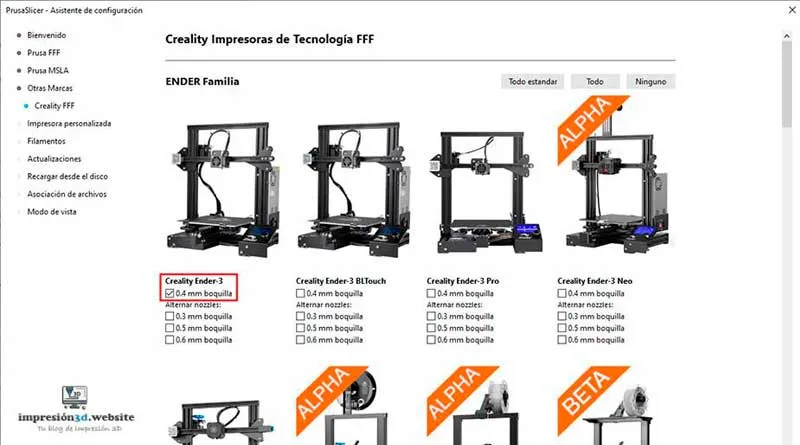
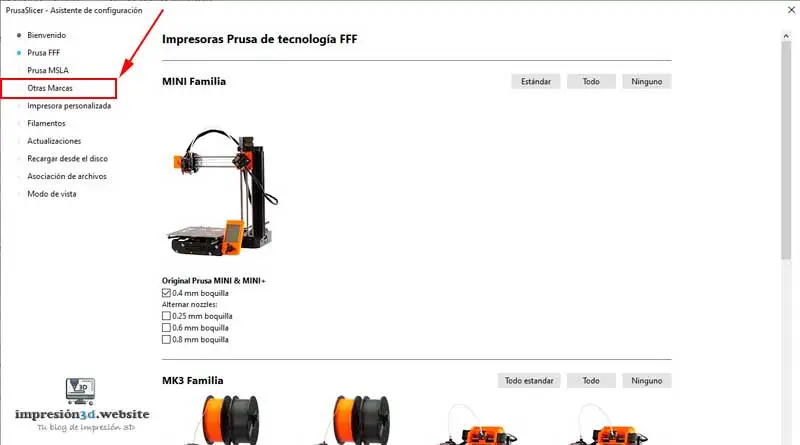
4. Click on other brands.
If your printer is a different brand, click «Other Brands»
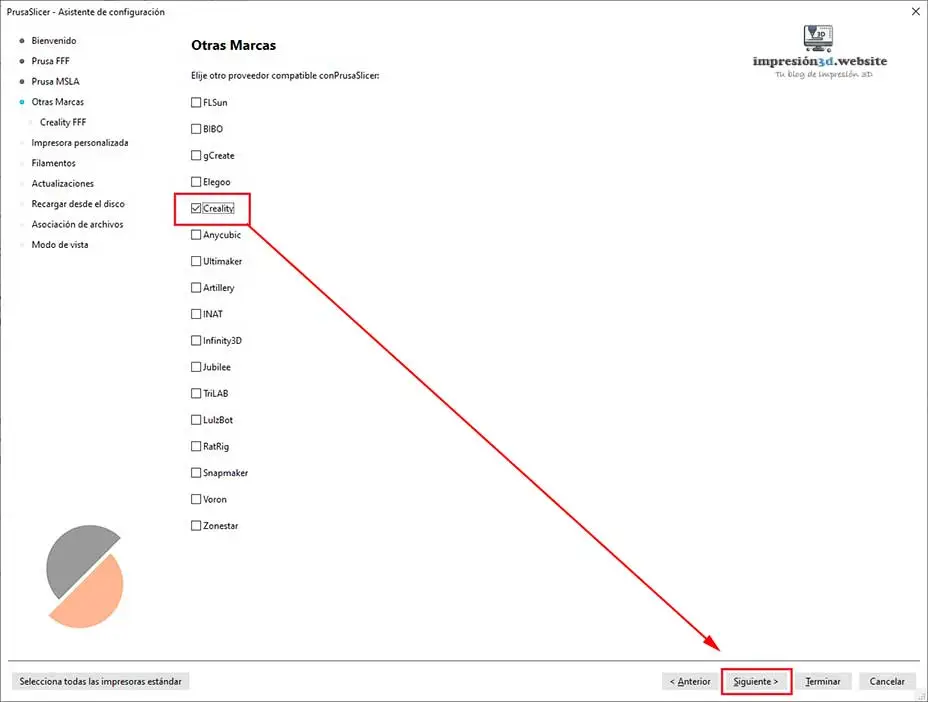
5. Choose the brand of your 3D printer
Select your 3D printer brand and click «Next»
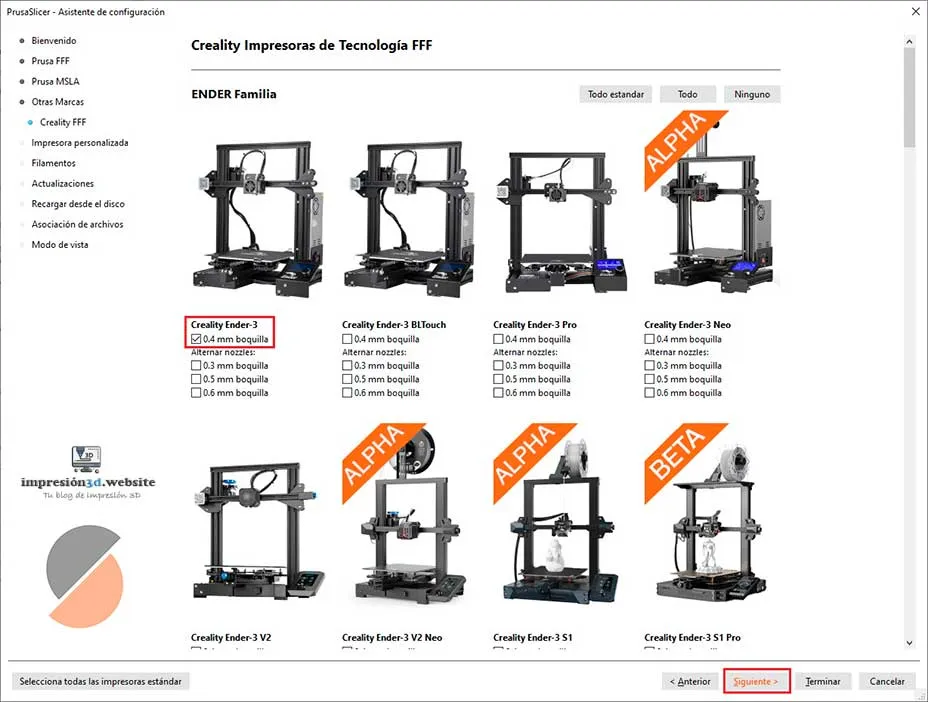
6. Choose the 3D printer model
I'm going to choose a Creality Ender 3 with a 0.4mm nozzle
After selecting your model, click «Next.».
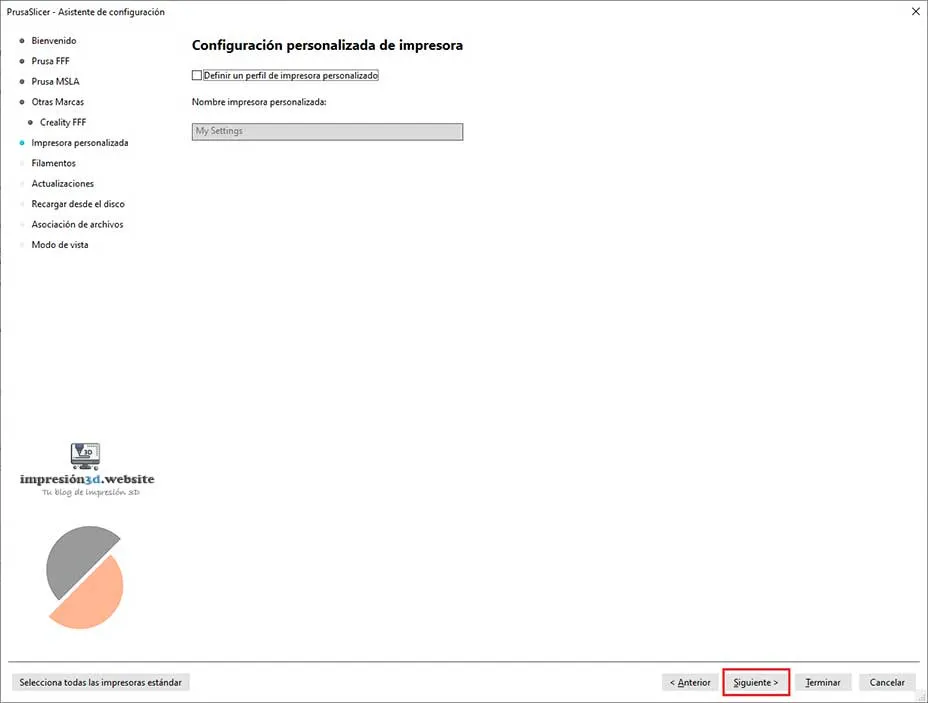
7. Custom Settings
In case your 3D printer is not listed anywhere, this is where you can enter its name and configure it manually.
If you've already selected your printer from the list, click «Next.».
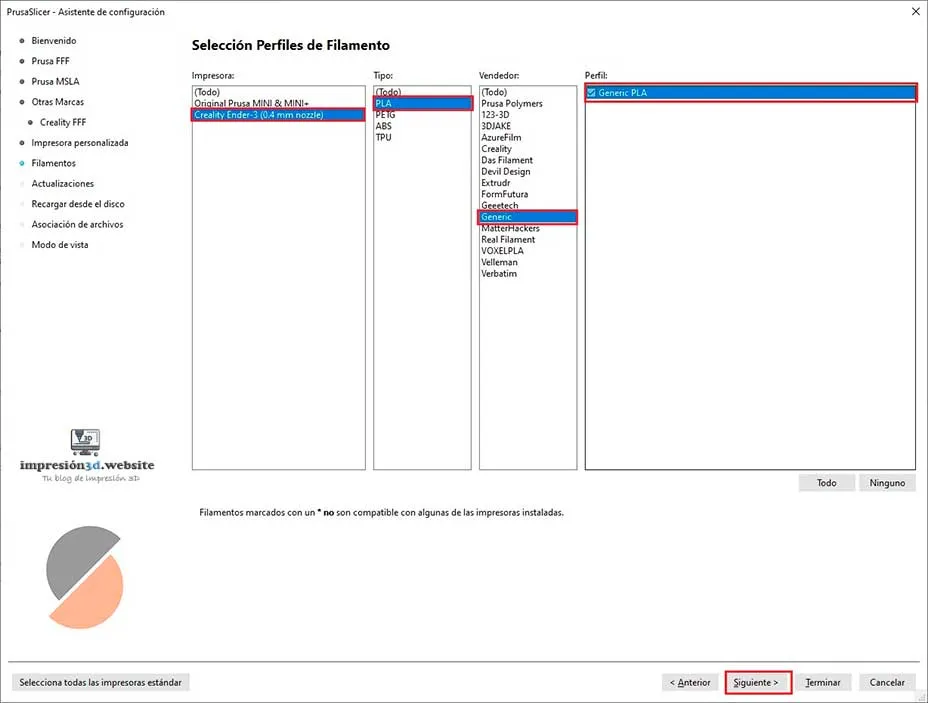
8. Select Filament Profiles.
Here you can configure the filaments you are going to use.
In my case I am going to choose all the generic options.
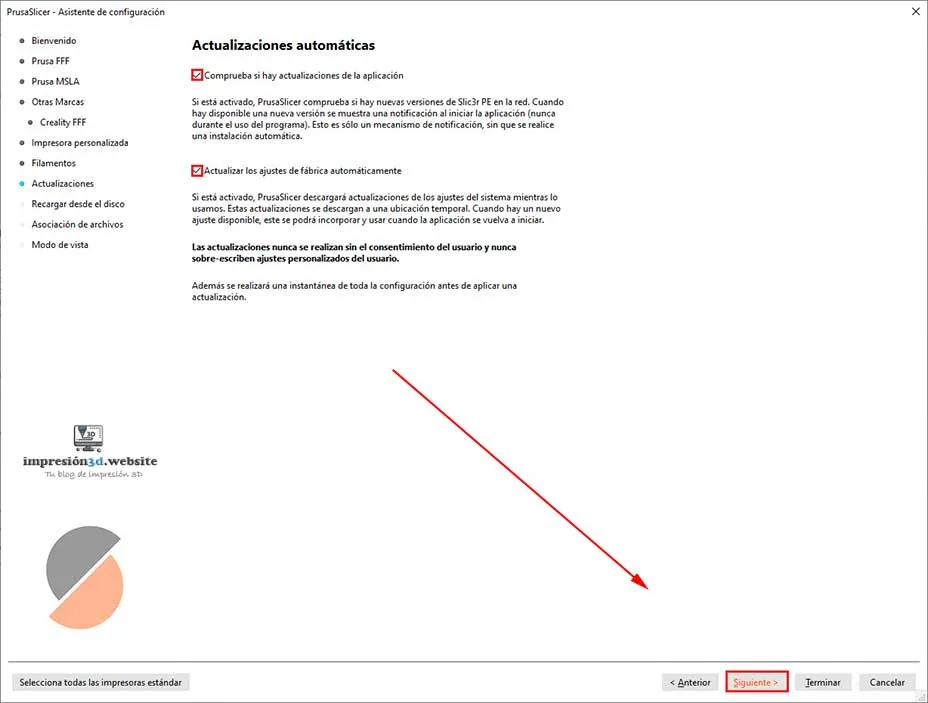
9. Automatic updates.
Select both options to have the PrusaSlicer program update automatically.
Click «Next.».
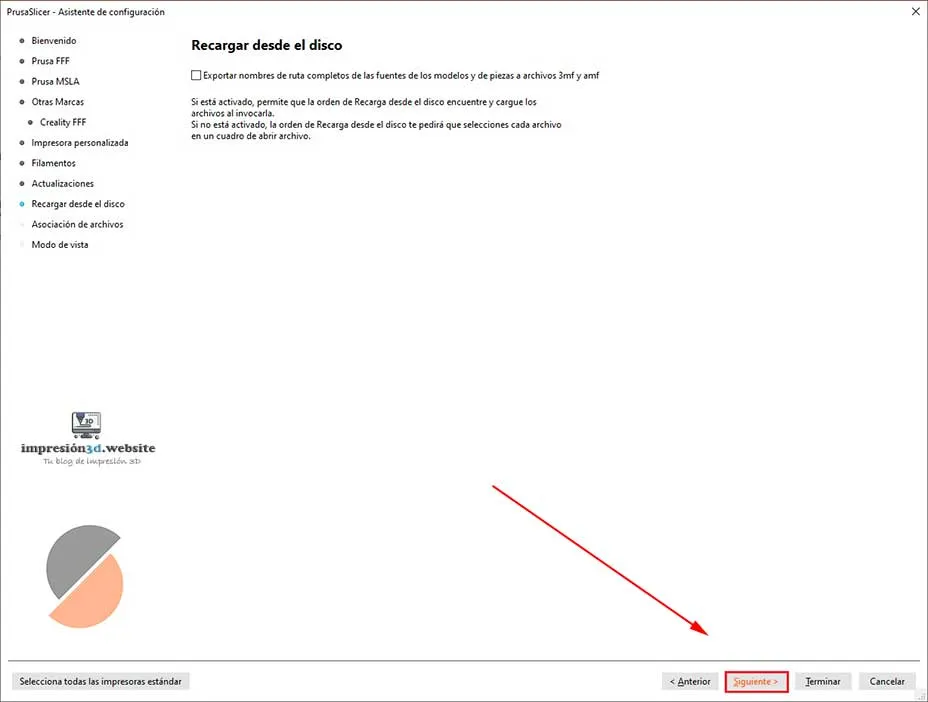
10. Reload from disk
According to the official PrusaSlicer page, this feature is useful when you want to replace the newer version of a model with the older version, without having to reconfigure things like custom supports for example.
You can read more here.
I'm going to leave it turned off. Click «Next.».
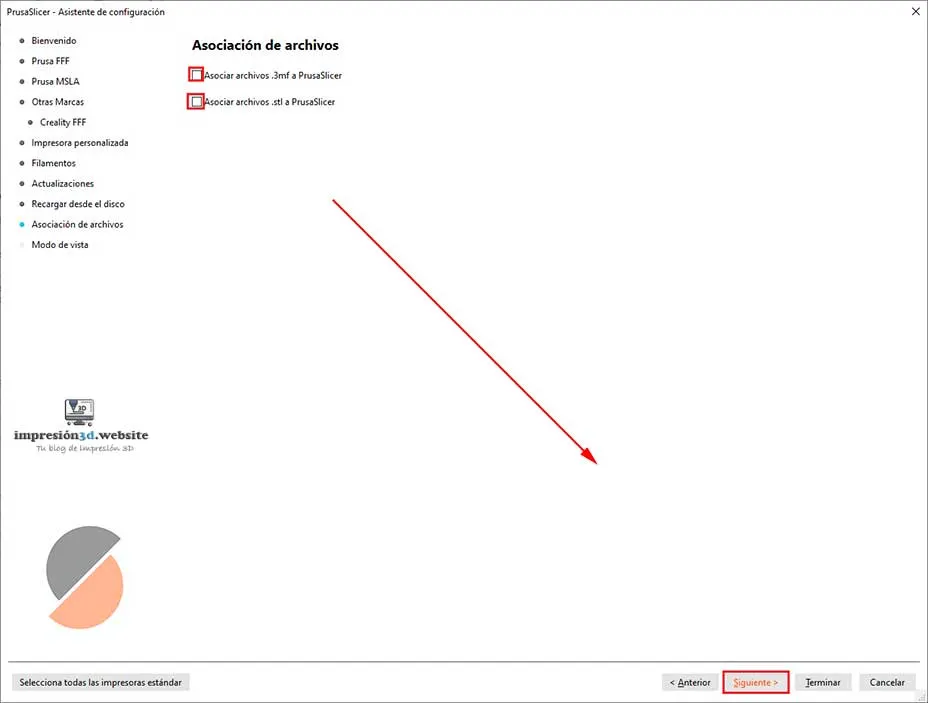
11. File association.
Checking these boxes will associate the .3mf and .STL files with PrusaSlicer.
This means that every time you double-click on a file, PrusaSlicer will open automatically.
If you use another slicer, don't select them.
Click «Next.».
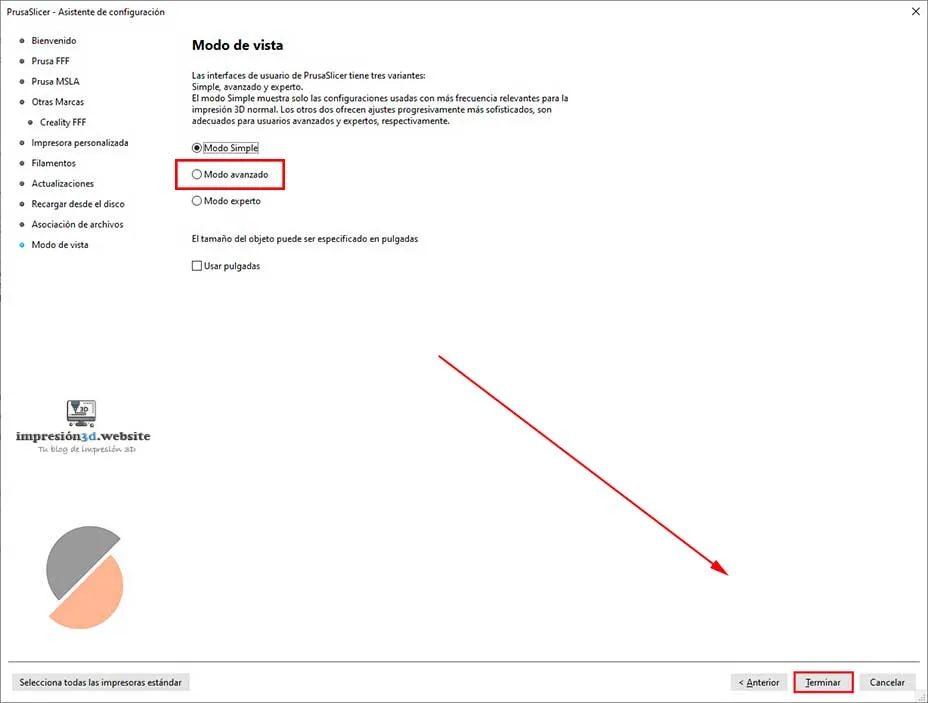
12. View Mode
If you're a beginner, you can leave «simple mode» selected. This mode is basic and doesn't have many settings that can be changed.
If, on the other hand, you're a more advanced user, select «Advanced Mode» to have greater control over all settings and parameters.
Click Finish.
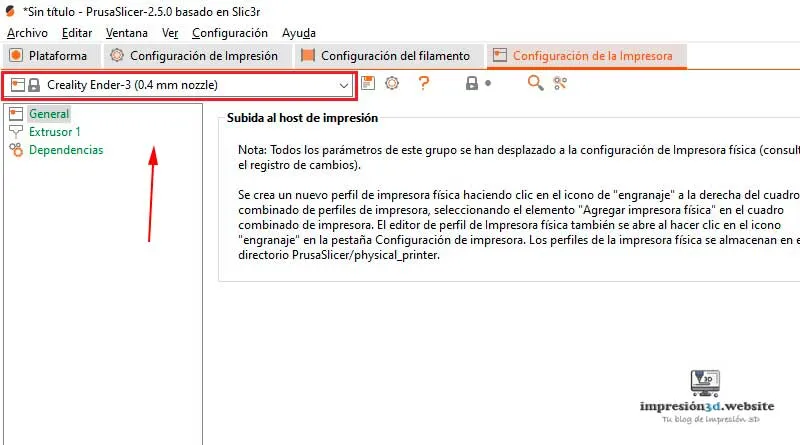
13. Check that your 3D printer has been added.
Your printer should appear in the same printer profile window.
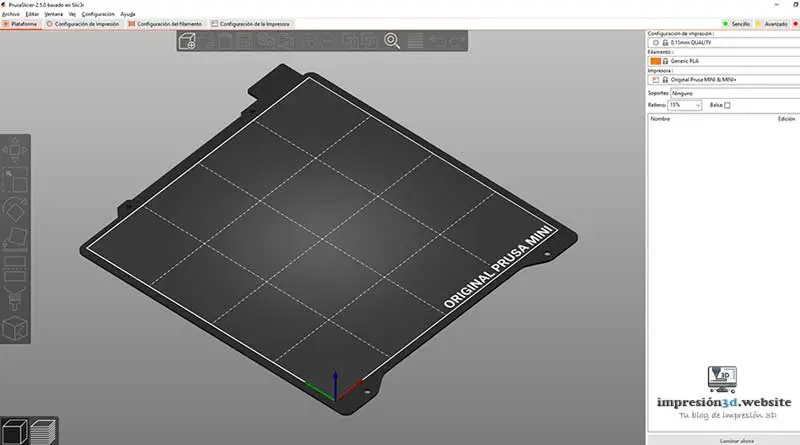
14. Check the Platform tab.
On the platform tab you should see the plate with the brand or logo of your 3D printer
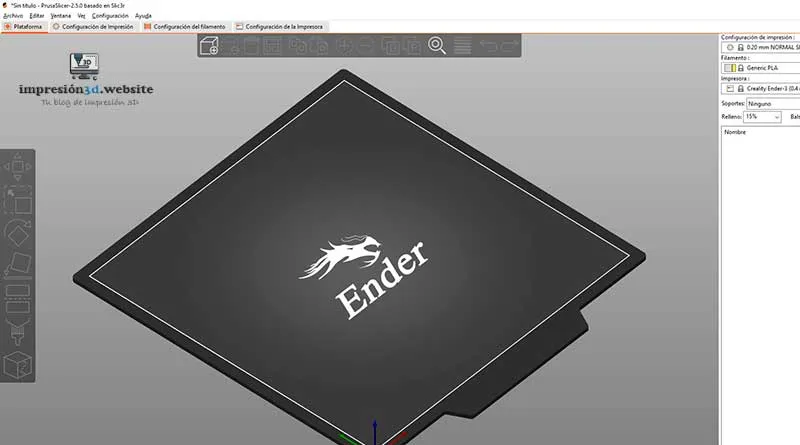
If everything went well, your 3D printer will now be added to PrusaSlicer.

Responses