Strategies for improving adhesion on the 3D printing bed without spending money
Adhesion on the first layer is the basis of a good 3D print. If it is not adhered properly, the print can fail, warp or peel off in the middle of the process. Fortunately, there are ways to improve adhesion without spending money or with inexpensive solutions you already have at home. Here's how to do it.
1. Correctly level the print bed
Bed leveling is the first step to good adhesion. If the bed is not properly leveled, the nozzle may be too high (causing the filament not to adhere) or too low (which can clog the extruder or cause the first layer to flatten too much).
Problems of poor leveling:
- If the nozzle is too high, the first coat will not stick well and will peel off easily.
- If the nozzle is too low, the filament can be crushed excessively and generate inconsistencies in the print.
- An uneven bed generates parts of the print that are well adhered and others that are not, which causes failures in the part.
Solution:
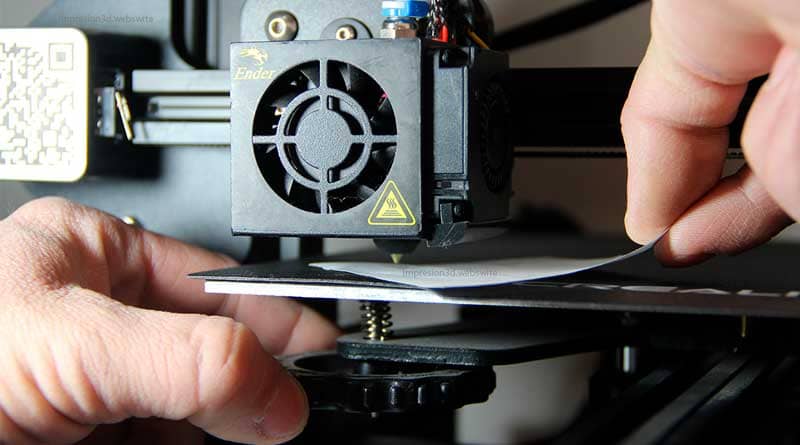
- Use a sheet of paper to calibrate the distance between the nozzle and the bed. The sheet should slide with slight resistance between the nozzle and the printing surface.
- Adjust the leveling screws manually at the four corners and in the center if necessary.
- If your printer allows it, use an automatic leveling sensor to improve accuracy.
- Check the levelness regularly, as over time the bed may become misaligned due to vibrations or temperature changes.
2. Adjusting the nozzle distance (Z-offset)
He Z-offset is the parameter that defines the distance between the nozzle and the print bed in the Z-axis. An incorrect setting of this value can generate adhesion problems in the first layer, affecting the entire print.
Why is it important to set the Z-offset correctly?
If the nozzle is too high:
- The filament will not adhere well to the bed and the print will fail.
- Loose filament lines may form in the first layer.
- The part may peel off during printing.
If the nozzle is too low:
- The nozzle can become clogged by filament buildup.
- The filament may expand too much and affect the accuracy of the print.
- There may be dragging of the filament in the first layer, causing irregularities.
If the nozzle is too high, the filament will not adhere well. If it is too low, the extrusion will be uneven.
Solution:
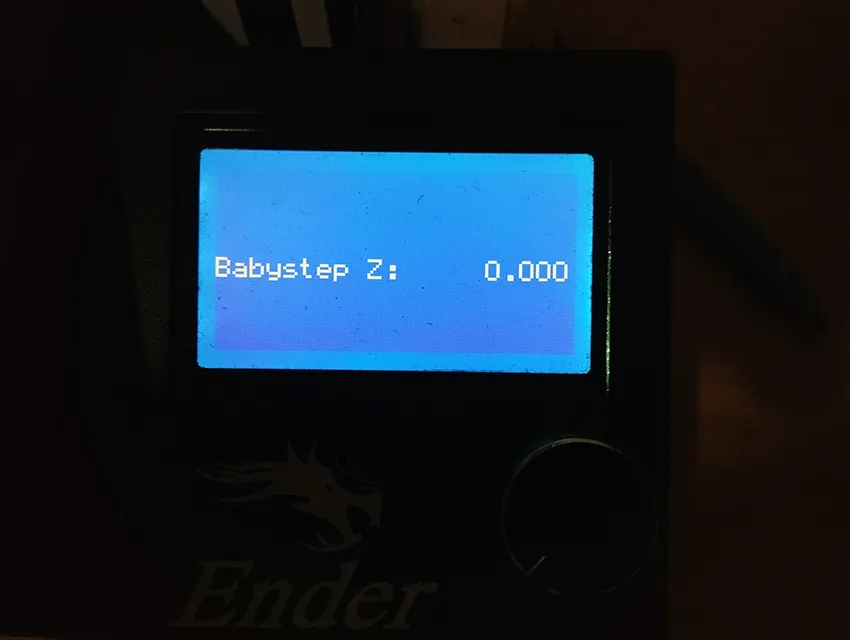
- Use the "Baby Stepps" function (if your printer has it) to adjust the height in real time.
- Modify the "Z-offset" in the printer software.
How to adjust the Z-offset on an Ender 3
Follow these steps to correctly calibrate the nozzle distance:
1. Preheat the printer
Before adjusting the Z-offset, it is essential that the nozzle and bed are at the proper printing temperature. This prevents thermal expansion from affecting the adjustment.
- Turn on the printer and access the menu.
- Go to «Control» → «Temperature» and adjusts the bed and extruder temperature:
- PLA: 60°C bed, 200°C nozzle.
- ABS: 100°C bed, 230°C nozzle.
- Wait for the temperature to stabilize before continuing.
2. Access the manual adjustment option
- In the main menu, select «Set Up» → «Axis Offset» → «Z Offset».
- Reduce the Z-axis until the nozzle is very close to the bed.
- Place a sheet of plain paper (80 g/m²) between the nozzle and the bed.
3. Adjust the nozzle distance manually
- Move the nozzle up or down in small increments.
- The ideal distance is that in which the sheet of paper can slide with some resistance, but without being trapped.
- If the blade moves too freely, lower the nozzle further.
- If the blade does not move, raise the nozzle a little.
4. Z-offset adjustment if you use a self-leveling sensor.
If your Ender 3 has a BLTouch or CR-Touchthe process is different:
- Go to «Control» → «Motion» → «Z-offset».
- Use the buttons to raise or lower the value until the same resistance is achieved with the sheet of paper.
- Saves the value set in the firmware with the option «Save settings».
5. Verify with a test print
- Load a test file with a large first layer (can be a 50×50 mm square).
- Observe how the filament is deposited:
- If it is too far apart and does not adhere, lower the Z-offset further.
- If it is too flattened and rough, raise the Z-offset.
- Adjusts the Z-offset in real time if your printer has the «Baby Steps» in the menu.
3. Cleaning and maintenance of the printing surface
One of the most common reasons for filament not adhering properly to the print bed is dirt accumulated on the surface. Filament residue, dust, finger grease and even adhesive residue can affect adhesion and cause print failure.
Why is it important to clean the printing bed?
If the print bed is dirty:
- The filament will not stick well in the first layer, causing warping or printing failures.
- Imperfections and bubbles may form at the base of the part.
- Accumulated residues can generate irregularities on the printing surface.
A proper maintenance ensures that the bed surface is always in optimum condition for printing, reducing faults and improving adhesion.
Solution:
- Use isopropyl alcohol to clean the bed before each printing.
- Avoid touching the bed with your hands to avoid leaving grease.
How to clean the printing bed properly
Depending on the material of the printing surface, there are different cleaning methods.
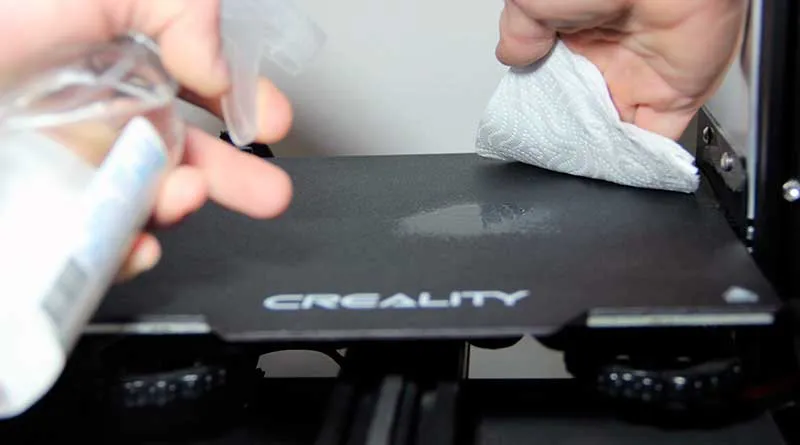
1. Cleaning with isopropyl alcohol (for glass and smooth surfaces)
This is the most effective and easiest method for cleaning glass beds, smooth PEI or flat untextured surfaces.
Steps to follow:
- Turn off and let the printer cool down before cleaning the bed.
- Use isopropyl alcohol at 70% or 99% and a clean microfiber cloth or lint-free paper.
- Moisten the cloth with alcohol and rub the entire surface in circular movements.
- Wait for the alcohol to evaporate completely before printing.
Tip: If you use a glass sheet, you can wash it with soap and water once a week to remove any sticky residue.
2. Soap and water cleaning (for glass beds or removable surfaces)
If the bed has traces of glue stick, lacquer or other adhesives, the best option is to use soap and water.
Steps to follow:
- Remove the print bed if possible.
- Wash with warm water and neutral soap.
- Use a soft sponge to rub the surface without scratching it.
- Rinse well and dry with a clean cloth before placing it back in the printer.
💡 Avoid touching the bed with your fingers after cleaning it.The skin's oiliness may affect adhesion.
3. Cleaning with acetone (for PEI foils or textured surfaces)
If you use a PEI sheet or a textured base, the alcohol may not be sufficient to remove the accumulated grease over time.
Steps to follow:
- Applies a small amount of pure acetone in a clean cloth.
- Rub the surface carefully.
- Wait for the acetone to evaporate completely before printing.
⚠️ Caution: Do not use acetone on acrylic or polycarbonate surfaces, as they may be damaged.
Maintenance to avoid accumulation of residues
To ensure good adhesion on each print, follow these recommendations:
- Clean the bed after every 3 or 4 prints. with isopropyl alcohol.
- Avoid touching the bed with your fingers after cleaning. If necessary, use gloves or tweezers to handle the filament.
- Do not use excessive adhesives. If you apply glue stick or lacquer, remove them before each new print.
- Check the surface regularly to detect signs of wear or debris accumulation.
When is it necessary to replace the printing surface?
If you notice that, despite proper cleaning, adhesion is still poor, it may be time to change the printing surface.
Signs of wear:
Deep scratches or peeling on the PEI film.
Loss of texture on rough surfaces.
Cracks or deformations in the glass.
Good maintenance will extend the life of the print bed and improve the quality of your parts without spending extra money on adhesives or expensive solutions.
4. Adjust bed temperature
Temperature plays a key role in the adhesion of the first layer. If the bed is too cold, the filament will not stick well and may peel off during printing. On the other hand, if the temperature is too high, the material may warp or become excessively sticky.
Each material needs an optimum temperature to adhere well.
Why is it important to set the temperature correctly?
- Better initial adhesion: A proper fit helps the first layer adhere firmly to the bed.
- Avoid warping: Materials such as ABS tend to peel off if the temperature of the bed is not adequate.
- Reduces printing errors: Incorrect temperature may cause the layers not to fuse well or the part to deform.
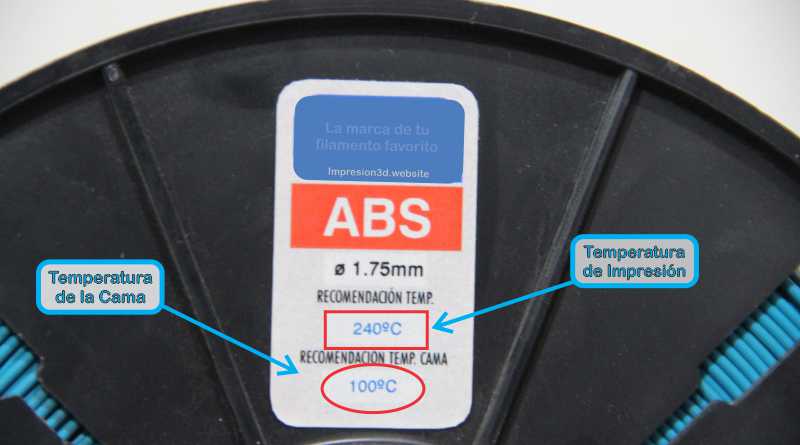
Recommended temperatures depending on the material
Each type of filament requires specific bed and extruder temperature settings. The recommended values are shown below:
Recommended temperatures:
Each type of filament requires specific bed and extruder temperature settings. The recommended values are shown below:
| Material | Extruder temperature | bed temperature |
|---|---|---|
| PLA | 190 - 220°C | 50 - 65°C |
| ABS | 220 - 250°C | 90 - 110°C |
| petg | 220 - 250°C | 65 - 85°C |
| TPU | 200 - 230°C | 40 - 60°C |
| Nylon | 240 - 270°C | 80 - 110°C |
Tip: If the filament does not adhere properly, try raising the bed temperature in 5°C increments until the optimum setting is found.
How to adjust the temperature on an Ender 3 3D printer
In a Ender 3 or similar printers, you can change the bed and extruder temperature from the display menu.
To adjust the temperature before printing:
- Turn on the printer and go to the configuration menu.
- Choose «Control» → «Temperature».
- Adjust the extruder and bed temperature according to the material you are using.
- Wait a few minutes until the printer reaches the set temperature.
To adjust the temperature during printing:
- Press the control button on the screen.
- Go to «Settings» → «Temperature».
- Modify the extruder or bed temperature in real time.
💡 If the first layer does not adhere well, you can increase the temperature of the bed for the first few minutes and then lower it to its normal value.
How do I know if the temperature is incorrect?
If the temperature is too low:
❌ The filament does not stick to the bed and the first layer peels off.
❌ Gaps form at the base of the impression.
❌ Warping may occur, especially with ABS or Nylon.
If the temperature is too high:
❌ The filament becomes sticky and generates an irregular base.
❌ Threads or lumps are created in the first layer.
❌ The part may be deformed or show lack of definition in details.
Additional tips to optimize temperature
✅ Preheat the bed before printing: Allow the bed to reach the desired temperature for at least 2-3 minutes before starting the print.
✅ Avoid drafts: A cold environment can cause the bed to lose temperature quickly.
✅ Use a closed box for ABS and Nylon: Helps maintain a stable temperature and prevents warping.
✅ Use a temperature tower: A temperature tower can tell you the ideal temperature for your printer and the filament you purchased (See more here).
5. Modify the first layer in the cutting software.
The adhesion of the first layer depends not only on the levelness of the bed and the temperature, but also on the configuration of the cutting software (slicer). Parameters such as layer height, type of adhesion to the base and printing speed can make a big difference.
Next, we will look at the most important settings you can adjust in slicers such as Ultimaker Cura, PrusaSlicer and Bambu Studio to improve adhesion without spending money.
He thickness, speed and configuration of the first layer influence adhesion.
Solution:
- Increase the thickness of the first layer (minimum 0.2 mm).
- Reduces the printing speed of the first layer (10-20 mm/s).
- Activates a bonding base such as Brim either Raft.
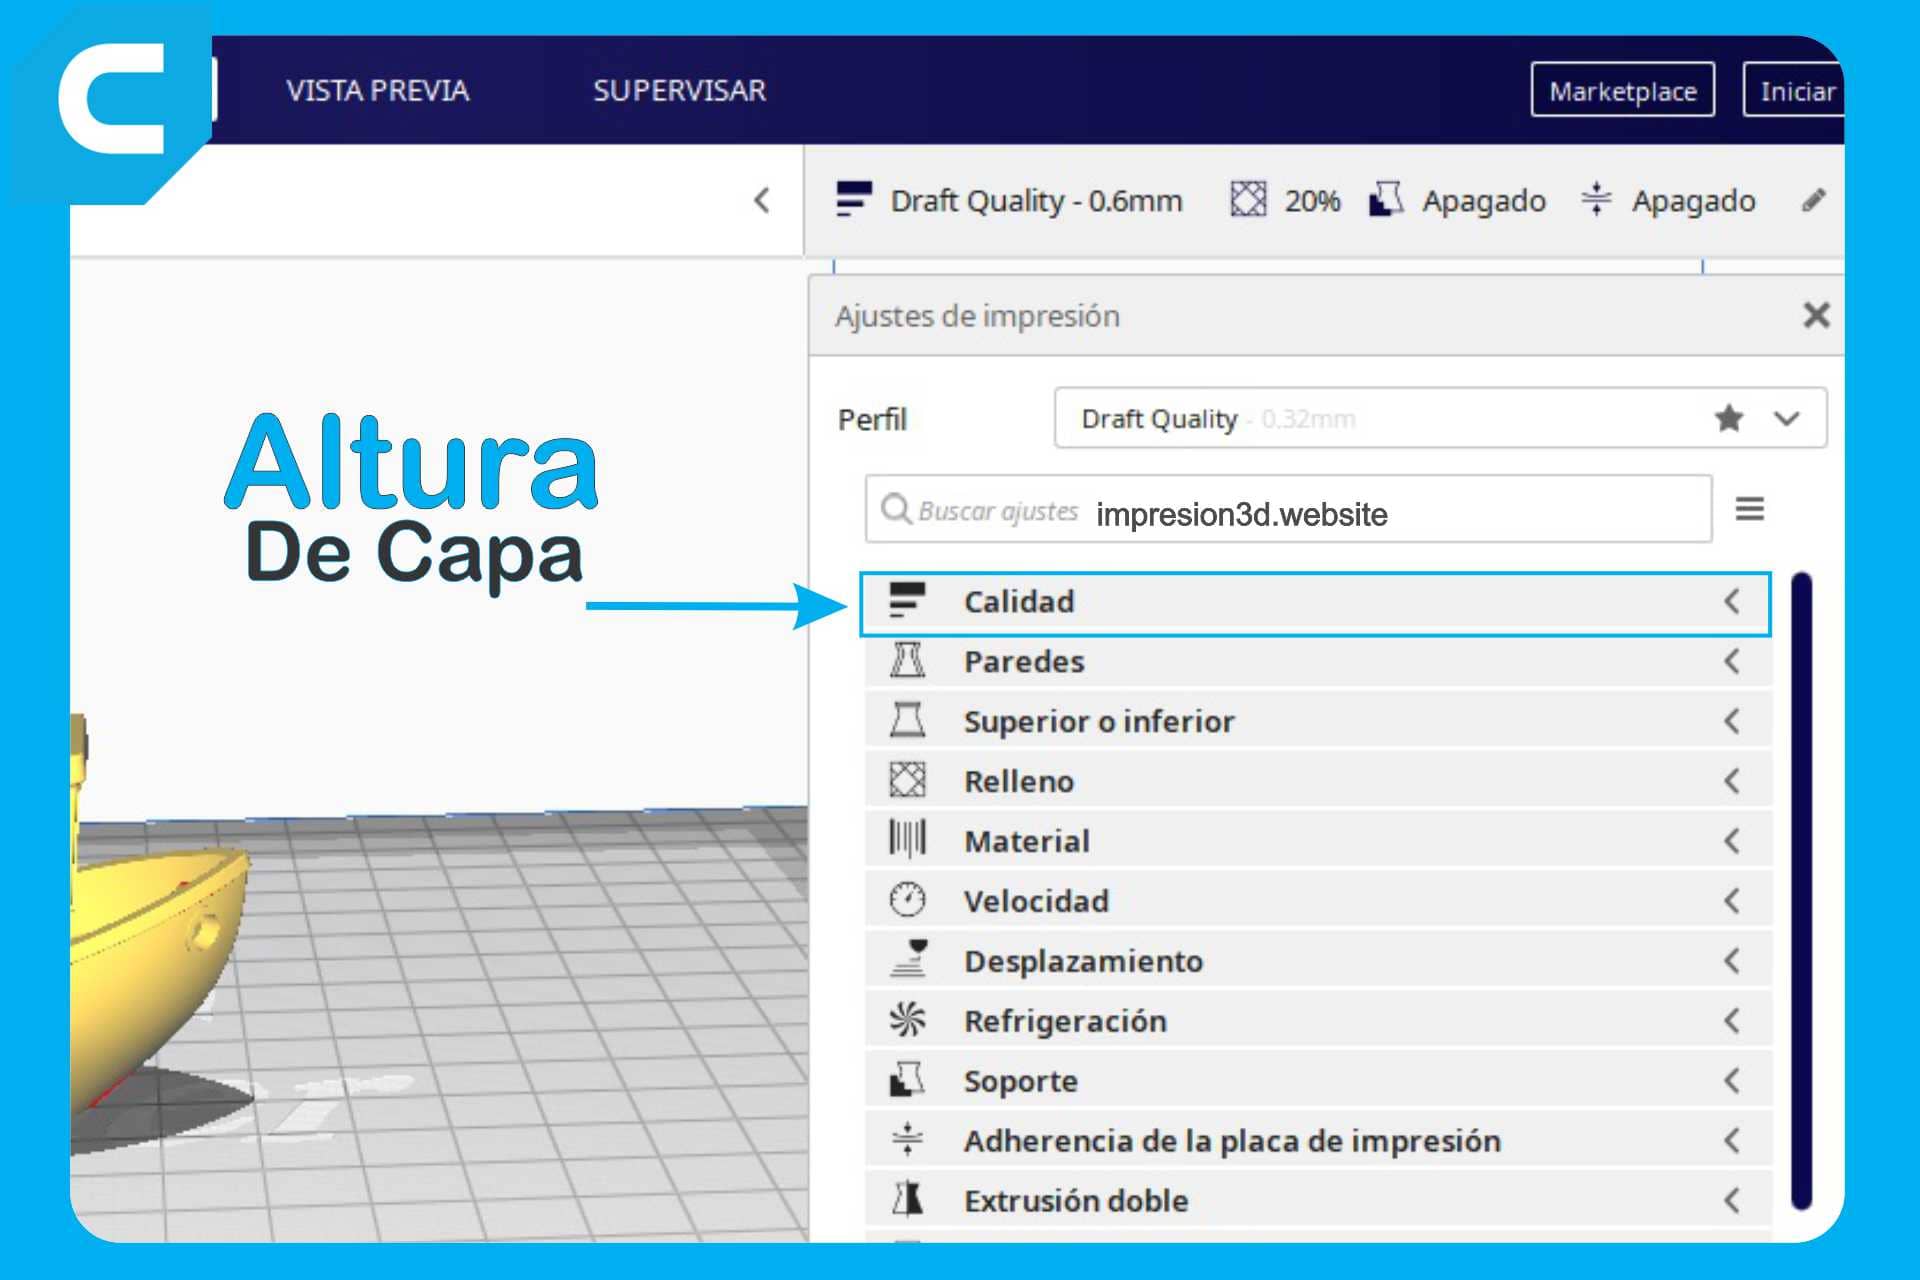
Adjust the height of the first layer
The first layer is the most important of all printing, as it establishes the foundation on which the rest of the part will be built.
Recommended height:
- Increase the height of the first layer helps to improve adhesion.
- A recommended value is between 0.2 mm and 0.3 mm for printers with standard 0.4 mm nozzles.
- In Cura, this setting is found in:
"Height of the first layer"
Tip: If the nozzle is too close to the bed, the first layer will be crushed. If it is too far away, the filament will not stick well.
Modify the extrusion width of the first layer
What is it?
It is the percentage of material that is extruded in the first layer. Increasing it improves adhesion.
Recommended values:
- 120% to 150% of the normal extrusion width.
- In Cura, you find it as: "Extrusion width of first layer".
Tip: A wider extrusion width gives the first layer more contact with the bedding, preventing it from peeling off.
Type of bed attachment: Brim, Raft or Skirt
The slicer allows the addition of bonding structures to improve the fixation of the part to the bed.
Types of adhesion:
Skirt (edge not in contact with the part)
- Useful to verify that the nozzle is extruding well.
- It does not directly improve adhesion.
Brim (edge attached to the part)
- Adds several lines around the part that improve adhesion without using too many materials.
- Ideal for PLA and PETG.
- In Cura it is configured in: «Type of base attachment» → “Brim”
Raft (raft under the piece)
- Creates a base under the part to improve adhesion.
- It is recommended for materials with warping problems such as ABS or Nylon.
- In Cura it is configured in: «Type of attachment to the base» → “Raft”
Tip: For most of the cases, a Brim of 5-10 lines is sufficient. Use Raft only if adhesion is a constant problem.
Adjust the speed of the first layer
The printing speed influences the way the filament is deposited on the bed.
Recommended values:
- 10-20 mm/s for the first layer.
- Lower speeds allow for better adhesion.
- In Cura, this setting is found in: «First-layer speed»
Tip: If you notice that the filament does not stick well, slow down first layer and see if adhesion improves.
Increase the temperature of the first layer
In many slicers you can configure a higher temperature for the first layer and then reduce it in the following layers.
Recommended values:
- Extruder: +5°C warmer than the rest of the print.
- Bed: +5°C to +10°C in the first layer.
- In Cura, this setting is found in: «Initial extruder temperature» and «Initial bed temperature».
Tip: Increasing the temperature in the first layer improves the fusion of the filament with the printing surface.
Enable retraction and ventilation correctly.
Retraction:
- For the first layer, it is recommended deactivate the retraction to prevent the filament from being pulled out too quickly and affecting adhesion.
- In Cura, you can find it in: «Enable retraction on the first layer» (deactivated).
🔹 Layer fan:
- For materials such as PLA, it is better to turn off the fan at the first layer and activate it afterwards.
- In Cura it is configured in: «Fan speed during the first layer» → 0% and then gradually raise it.
Tip: Do not use a fan in the first coat to improve adhesion.
Summary of recommended slicer configurations
| Parameter | Recommended value |
|---|---|
| Height of the first layer | 0.2 mm - 0.3 mm |
| Extrusion width | 120% - 150% |
| Type of adhesion | Brim (5-10 lines) or Raft if necessary |
| First layer speed | 10 - 20 mm/s |
| Extruder temperature | +5°C more in the first layer |
| bed temperature | +5°C to +10°C in the first layer |
| Shrinkage in the first layer | Deactivated |
| Layer fan | Shutdown in the first layer |
Final tip: Always prints a test piece with different settings to find the best fit for your printer and material.
6. Cost-effective methods to improve adherence
While good leveling, temperature and slicer settings are key to achieving proper adhesion, in some cases it may be necessary to apply additional methods to prevent the print from peeling off. Fortunately, there is no need to spend on expensive solutions such as special foils or advanced surfaces.
Here are some of them economic tricks with materials you probably already have at home.
Homemade solutions:
- Glass with glue stick or hairsprayImproves adhesion and is easy to clean.
- Painter's tapeIdeal for PLA and easy to replace.
- Textured surfacesSome beds come with special coatings that improve adhesion.
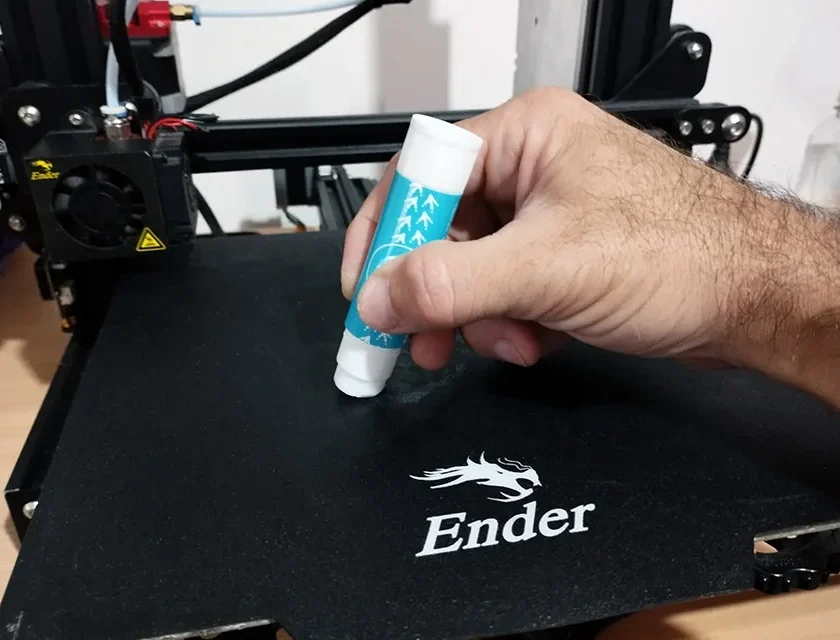
Glue Sticks: Easy, cheap and effective
One of the most widely used and most economical methods is the common glue stickThe type used in handicrafts or at school.
How does it help?
- Increases adhesion without damaging the bed.
- Easily cleaned with water.
- Works well for PLA, PETG and ABS.
How to use it:
Applies a thin and uniform layer on the printing bed.
Prints normally.
To clean it, use a damp cloth or warm water.
💡 Tip: Avoid applying too much as it may affect the quality of the first coat.
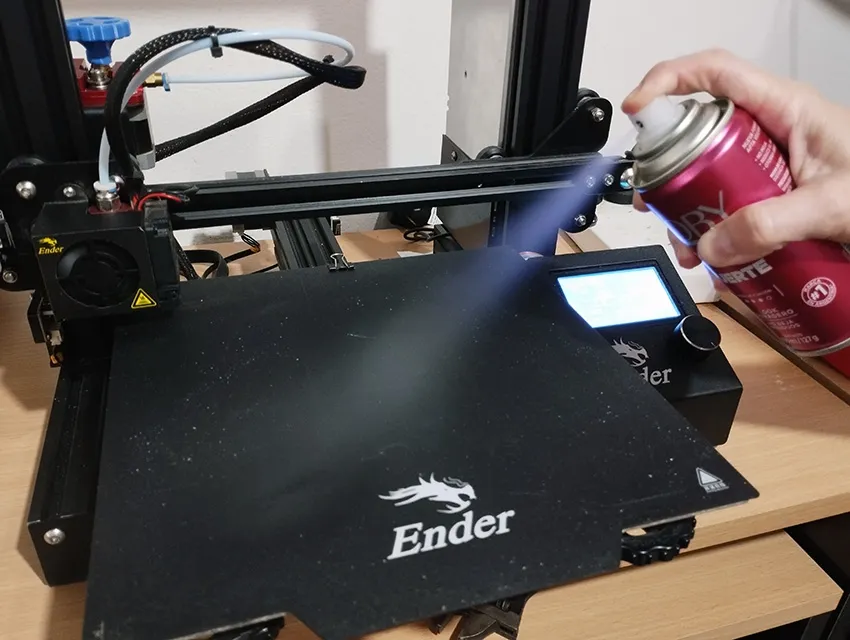
Hairspray: Strong hold at low cost
Another popular trick is to use hairsprayespecially those with strong or extra strong fixation.
How does it help?
- It creates an adhesive layer that improves the adhesion of the filament to the bed.
- It is useful for PLA, ABS and PETG.
How to use it:
Rocía a thin layer on the surface of the bed at a distance of about 20 cm.
Wait a few seconds for it to dry before printing.
To clean it, use a cloth with water and isopropyl alcohol.
Tip: Use a lacquer without oily ingredients to avoid difficult to clean residues.
Sugar water: A homemade adhesive
A natural and inexpensive alternative is to prepare a mixture of sugar waterwhich, upon drying, creates a sticky film on the printing bed.
How does it help?
- Works well with PLA and ABS.
- It is easy to apply and clean.
How to prepare and apply it:
Mix a spoonful of sugar in a little hot water until it dissolves.
Use a brush or cloth to spread a small amount of thin film in bed.
Let it dry for a few minutes before printing.
Tip: You can heat the bed to 60°C to accelerate drying.
Painter's tape or blue tape: Easy to use and reusable
The blue painter's tape (or masking tape) is another economical and very effective method, especially for PLA.
How does it help?
- Improves adhesion without affecting the bed surface.
- It can be reused several times.
How to use it:
- Place tape strips covering the entire bed without leaving spaces between them.
- Press well to avoid air bubbles.
- Prints directly on the tape.
- When it loses adhesion, replace it.
💡 Tip: If you notice that the print does not adhere well, use a squeegee to press the tape before printing.
Baking paper: A little-known but useful option
He baking paper (also called wax paper) can be used as an adhesive barrier that facilitates the removal of parts after printing.
How does it help?
- It prevents the piece from sticking too tightly to the bed.
- Works well with filaments such as PETG and TPU.
How to use it:
- Cut a piece of baking paper the size of the bed.
- Place it on the surface and tape the edges.
- Prints directly on paper.
Tip: Use it when you have problems with parts that stick too much and are difficult to remove.
Hot glass surface + isopropyl alcohol
If you have a glass bedYou can improve adhesion without spending money with a simple cleaning trick.
How to do it:
- Heats the bed to 60-70°C.
- Clean the surface with isopropyl alcohol at 70% or 90% and a lint-free cloth.
- Prints normally.
Tip: Make sure the surface is completely dry before printing.
Summary of economic methods
| Method | Material required | Recommended filaments | How to apply |
|---|---|---|---|
| Glue stick | Common glue | PLA, PETG, ABS | Apply a thin layer on the bed |
| Hair spray | Strong hold hairspray | PLA, ABS, PETG | Spray a light coat on the bed |
| Sugar water | Sugar and hot water | PLA, ABS | Apply with a brush and allow to dry. |
| Painter's tape | Blue masking tape | PLA | Paste on the bed without gaps |
| Baking paper | Baking paper | PETG, TPU | Place on the bed and secure with tape. |
| Hot glass + alcohol | Isopropyl alcohol | PLA, ABS, PETG | Clean the hot bed before printing |
There are many methods economical and effective to improve adhesion without the need to buy expensive surfaces. From glue sticks to homemade tricks like sugar water, each solution has advantages depending on the type of filament and print bed you use.
Final tip: Try different methods and combine the ones that work best for your printer and materials.
7. Gradually cool the bed at the end of the printing process.
If you remove the part while the bed is still hot, you may damage or break it.
Solution:
- Allow the bed to cool completely before removing the impression.
- Use a thin spatula to help peel off the piece without forcing it.
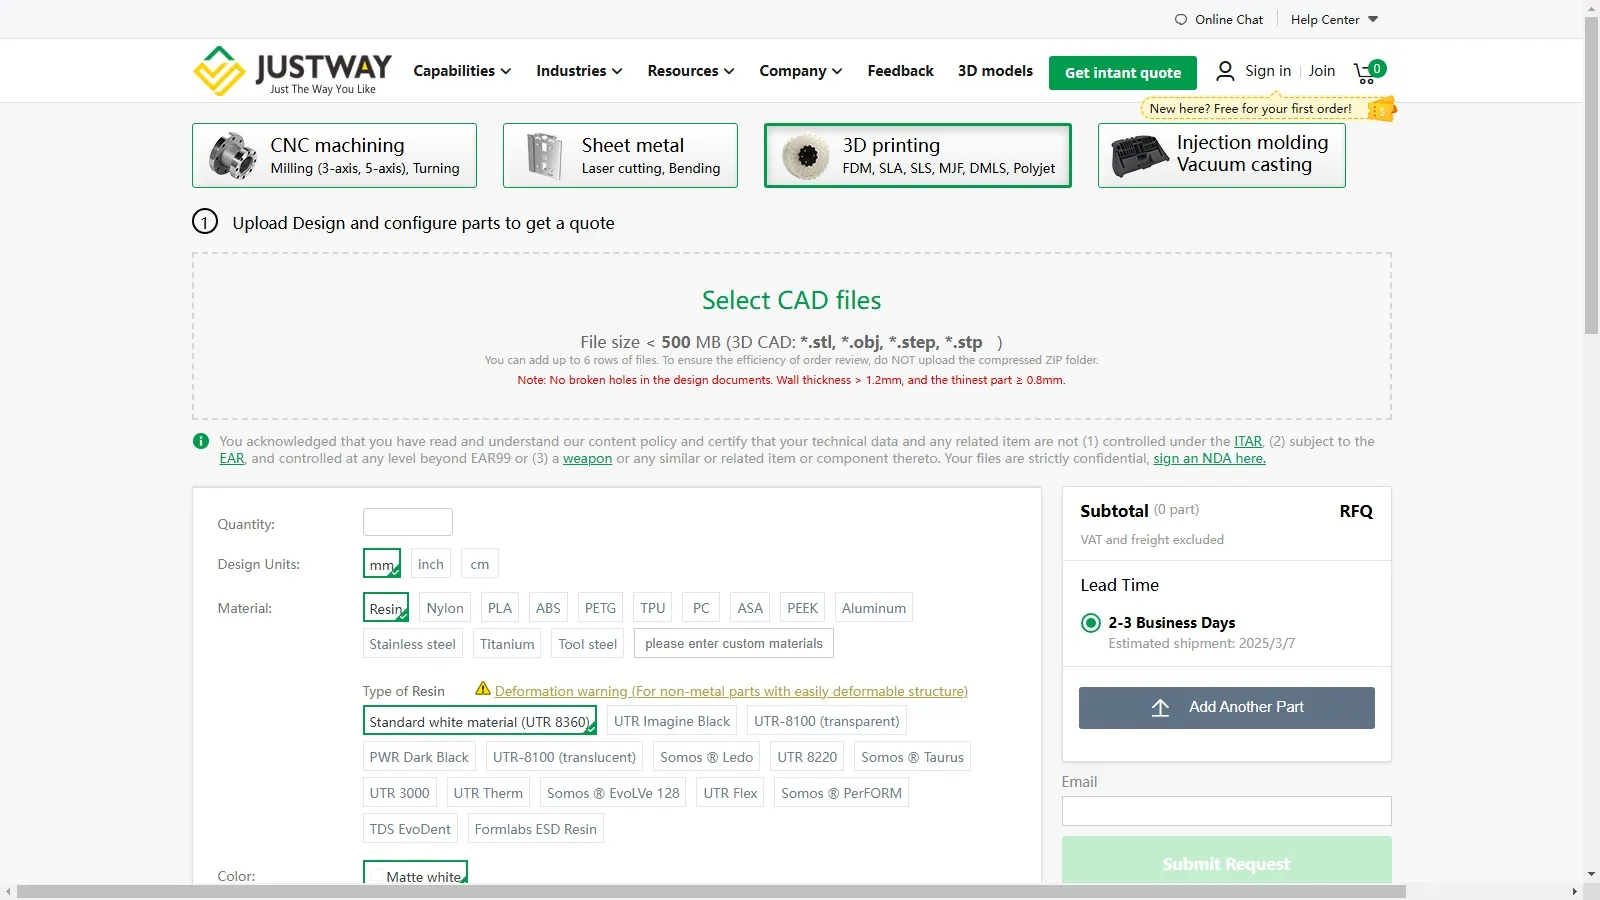
Your prints won't stick to the bed? Use Justway.com's online 3D printing service!
Sometimes, no matter how many adjustments you make, bed adhesion problems can waste your time, material and patience. If you're tired of trying over and over again without getting perfect results, there's a much simpler solution: the online 3D printing service from Justway.com.
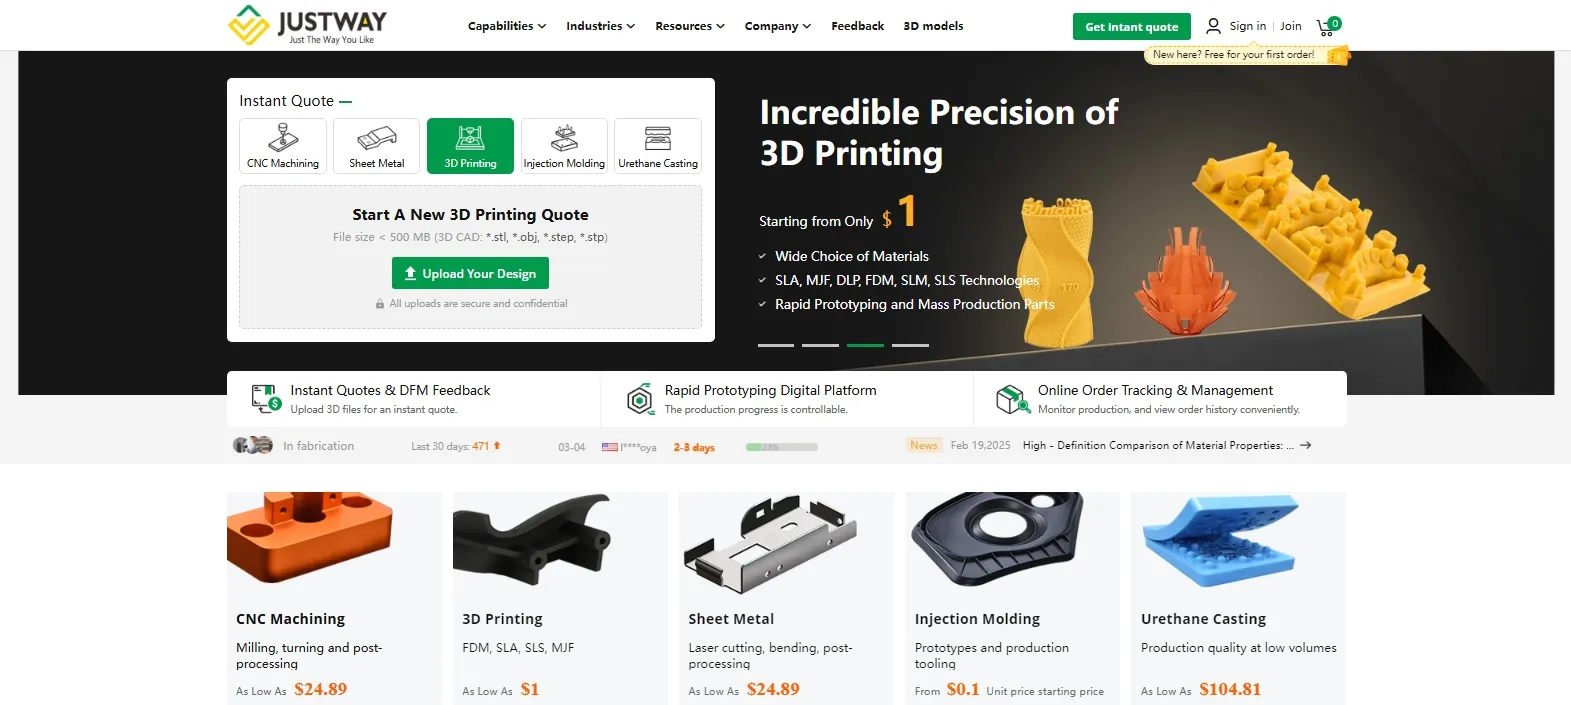
Justway is the ideal choice if you need professional quality 3D printed parts without worrying about printer calibration, bed adhesion or technical issues.
Why choose Justway.com?
Guaranteed professional quality: Forget about warping problems, poor adhesion or printing failures. Justway uses high-end 3D printers and premium materials to ensure flawless results.
Time and material savings: How much filament have you wasted on failed prints? With Justway, you only pay for the finished part, without spending on testing and adjustments.
Wide variety of materials and finishes: From PLA and ABS to specialized resins, you can choose the perfect material for your project.
Quick and easy process: Just upload your STL file, choose the material and you will receive an instant quote. Your part will be delivered to your home in a few days.
Ideal for personal and professional projects: Whether you are a designer, engineer or 3D printing enthusiast, Justway offers you the best solution for high-precision parts without hassle.
Don't waste any more time adjusting your printer and struggling with bed adhesion. Visit Justway.com and discover how easy it is to get perfect 3D parts effortlessly. 🚀
Conclusion
You don't need to spend money on expensive solutions to improve the adhesion of your prints. With these adjustments, you will get the first layer to adhere perfectly. Do you have another trick to improve adhesion? Share it in the comments and tell us which method worked best for you.


Responses