
How to 3D print faster?


If you want to print faster in 3D, there are several techniques and settings you can implement, such as modifying the layer height, fill density, print speed and other parameters.
If you're looking to optimize your 3D printing processes for faster and more efficient results, you've come to the right place.
We will explore various techniques and settings that will allow you to print faster without compromising the quality of your prints.
You will learn how to make your 3D printer print faster and discover how to use Ultimaker Cura to do it effectively.
How do I make my 3D printer print faster?
If you are looking to reduce printing time, especially using an Ender 3 with Ultimaker Cura software, here are a number of options you can consider for faster 3D printing:
1. Use a larger nozzle
Switching to a larger nozzle, such as a 0.8 mm nozzle instead of the standard 0.4 mm, can speed up printing considerably by depositing more material in each layer.
Normally when purchasing a 3D printer, the extruder comes from the factory with a 0.4 mm nozzle.
But this doesn't mean they can't be changed, in fact you can use the different nozzle sizes depending on what you need to 3D print.
For example, for larger prints you can use larger nozzles, thus decreasing the number of hours without decreasing the print quality.
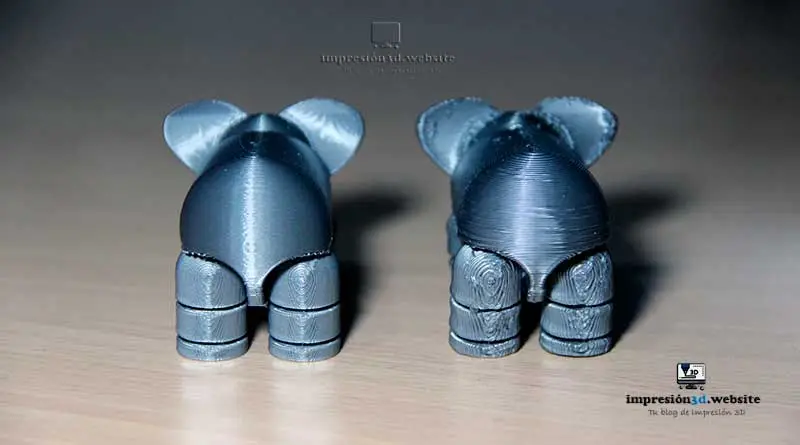
| settings | Elephant Left | Elephant Right |
| Nozzle | 04 | 08 |
| layer height | .2mm | .32mm |
| Speed | 50mm/s | 50mm/s |
| Printing time | 3 hours | 1 hour 25 minutes |
2. Increase the layer height
A simple way to speed up printing is to increase the layer height.
This means that the model will have fewer layers, and therefore, will print faster, reducing the overall printing time.
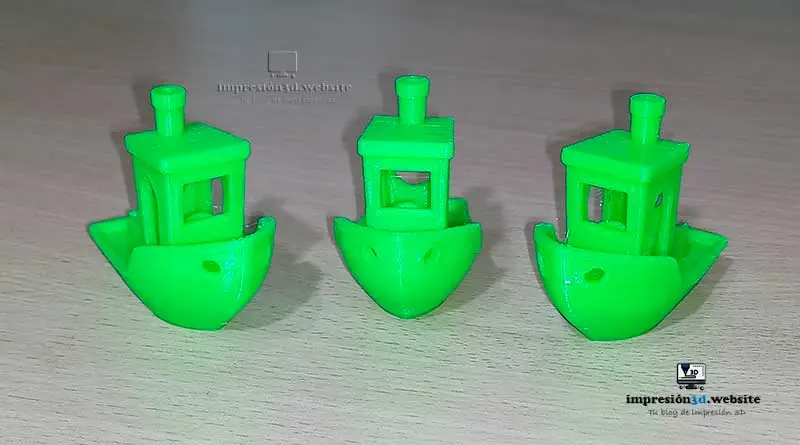
| settings | Benchy of the Left | middle benchy | benchy on the right |
| Nozzle | 04 | 04 | 04 |
| layer height | .2mm | .28mm | .32 |
| Speed | 50mm/s | 50mm/s | 50/s |
| Printing time | 1 hour 48 minutes | 1 hour 25 minutes | 1 hour 20 minutes |
However, increasing the Layer Height can affect the quality of the printed model, leaving the layers visible.
Remember to find the right balance so you don't sacrifice too much quality in your prints.
3. Reduce the number of walls
Both the top and bottom layers and the number of walls influence the printing time.
Reducing these figures in the Cura settings can speed up printing, but be careful not to compromise the strength or appearance of the final object.
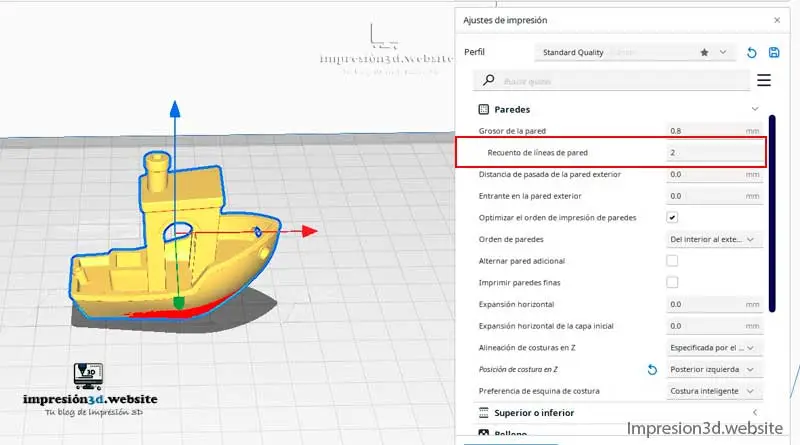
If you reduce the number of walls with an 04 nozzle and your filament is translucent, you run the risk that the fill lines will become visible.
With opaque colors you can use a minimum of 2 walls, otherwise you should use 3 walls so as not to expose the fill lines.
top and bottom layers:
Another issue will be the top and bottom walls, as many times 5 to 7 top and bottom layers are configured.
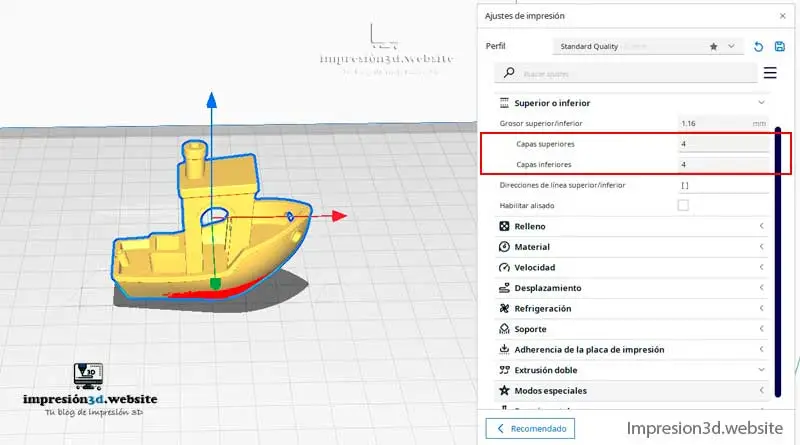
You can reduce the number of top and bottom layers, in this publication I show you how you can correctly close a model with 4 printed layers.
4. Reduce fill density
Often an excessive amount of filler is used for pieces that serve only a visual purpose.
By reducing the fill density, less material is used and, therefore, printing can be accelerated.
I would only recommend a denser filler for parts that are going to be subjected to some type of mechanical force, or that need to support some type of weight.
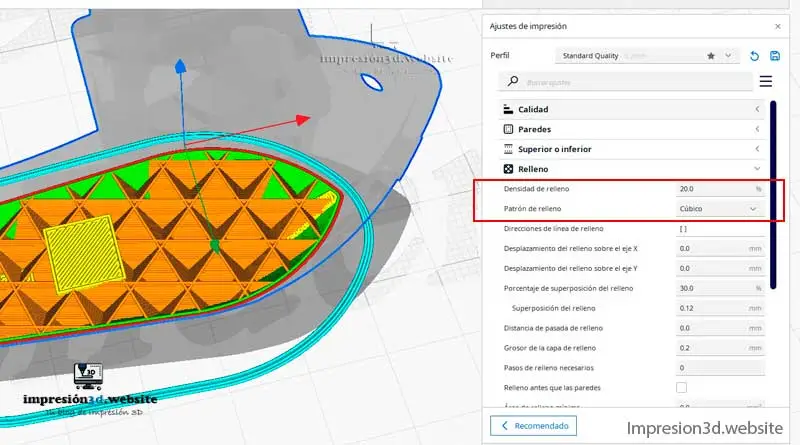
For visual pieces you can configure a fill between 15% and 20%
Just make sure that the infill reduction does not affect the structural integrity of the model.
5. Choose the best filling pattern
Cura offers different fill patterns, and each of them serves a certain purpose. (Here you can see a post on the padding settings in Cura)
Some fills are more complex than others and will therefore take the printer longer to complete.
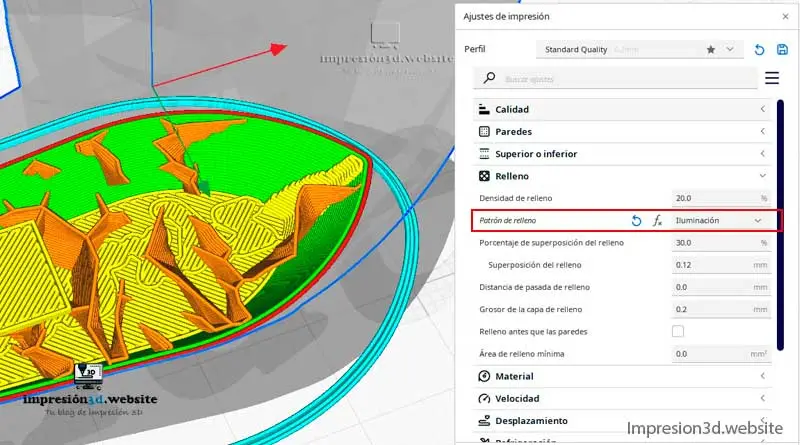
The «Lighting» fill pattern allows you to apply fill only to the parts necessary for building the model
Experiment with these patterns to find the right balance between speed and strength, depending on the purpose of the object.
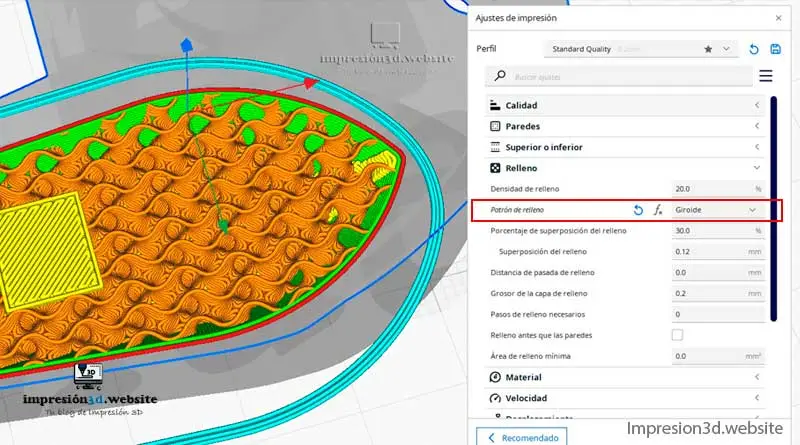
Personal clarification: Sometimes it’s better to «sacrifice» a few minutes of printing time in order to have a solid infill like the Giroide pattern, which covers the entire model with very low density.
6. Increase the thickness of the fill layer
Increasing the thickness of the fill layer is another way to reduce printing time.
Maybe you didn't know about this option, but it sure can take a few minutes off your mind.
Normally, the thickness of the fill layer is the same as the Layer Height. For example, with a layer height of 0.16 mm the thickness of the fill layer will be 0.16 mm.
The trick is to double the thickness of the filling layer.
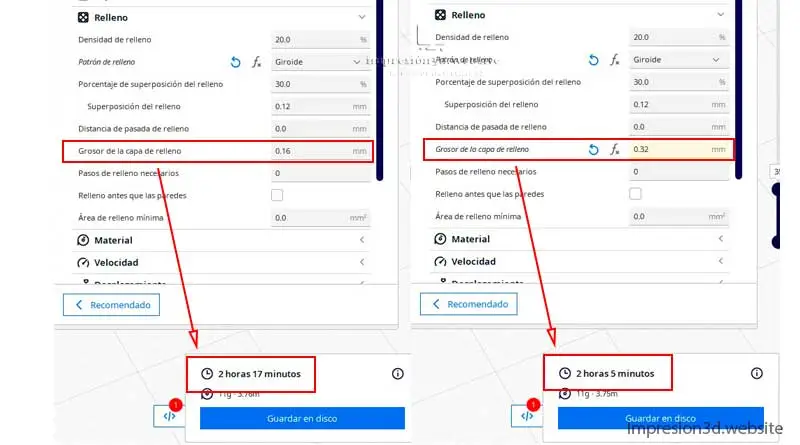
With this you will achieve that the nozzle will have to make fewer turns to extrude the filler, since it will only make one layer of walls and in the next layer it will print the filler using a thicker line.
Experiment with this setting to see if you can get good results.
7. Increases printing speed
Increasing print speed is an effective strategy to print faster.
However, you should be aware that overly aggressive magnification can affect print quality.
In the following example, I printed 3 elephants at the maximum speed allowed in Cura for an Ender 3, which is 150 mm/s (above that number the box turns red).
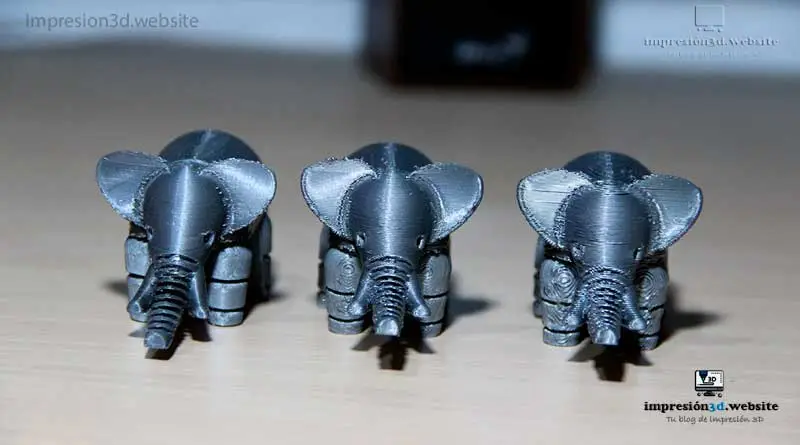
Each of the elephants was printed with a 08 mm nozzle and different layer heights (0.16 mm | 0.2 mm | 0.32 mm) for comparison.
In all 3 cases, the speed used on the Ender 3 significantly improved printing times. However, the extreme speed used caused problems in all 3 parts.
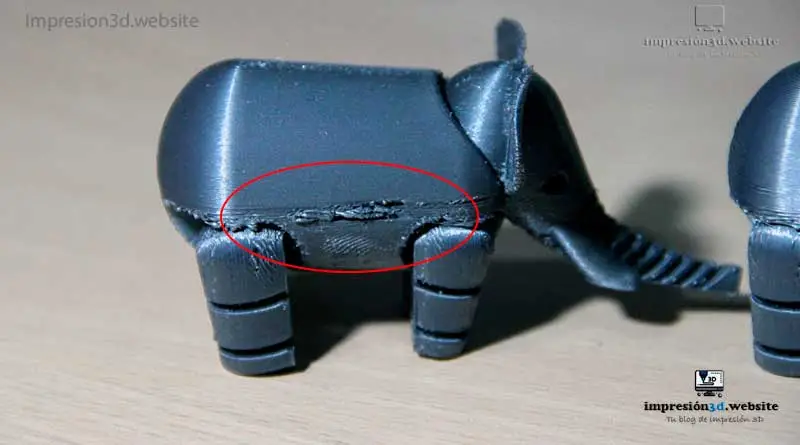
If the idea is to increase speed, you have to do it carefully as there can be dire consequences.
Doing some tests like this (See: elephant on Thingiverse) can be used for determine what is the best speed for your 3D printer.
8. Reduce the number of supports
One strategy to speed up printing is to reduce the amount of media required.
A useful technique is to rotate the 3D model in slicing software, such as Ultimaker Cura. By changing the orientation of the model, it is possible to eliminate the need for supports in certain areas.
Adjusting the substrate parameters in the software can help to print with fewer substrates or lighter structures, which reduces printing time.
If you want to learn about the specific settings for optimizing supports in Ultimaker Cura, I recommend reading our detailed article: «Easy to remove supports in Cura: Better settings«.
This article provides valuable information on how to adjust media settings for faster and more efficient printing results.
You can experiment with object orientation and support settings in Ultimaker Cura.
Conclusions:
Optimizing printing times without sacrificing quality is a valuable skill to develop.
Can all the options listed here be applied at the same time? Yes, of course they can. The only problem is going to extremes without trying them out first.
I recommend to all beginners to try larger nozzles of 0.6 mm and 0.8 mm because they can obtain very good quality parts, with a significant reduction in printing times.
By applying the above techniques and adjusting parameters in Cura, such as layer height, fill density and print speed, you can achieve faster 3D printing without losing too much in terms of quality.
Frequent questions
How can I print faster in 3D? Adjust parameters such as layer height, fill density and print speed in Ultimaker Cura.
Is it possible to print faster with an Ender 3? Yes, by adjusting the parameters mentioned in this publication, you can optimize the 3D printing speed.
What impact does a larger nozzle have on print speed? Switching to a larger nozzle can increase print speed by depositing more material, but may fail on models that have walls less than 0.8 mm thick.
What is the recommended 3D printing speed in Ultimaker Cura? The ideal speed for an Ender 3 is 50 mm/s, this may vary depending on the 3D printer, the model and the desired quality, so it is important to test and adjust.
How can I reduce the amount of brackets in Ultimaker Cura? Experiment with the support configurations and part orientation in the Slicer to reduce the need for supports.




Good afternoon,
I recently purchased an Anycubic Kobra 2 that can print at a speed of 300 mm/sec, although 200 mm/sec is recommended. The question is: I can print with the usual profile, only changing the speeds, or when changing these, I must also change other parameters.
Greetings and thanks for this tutorial that can be of great help.
Hello! Good afternoon!
The logical thing would be to create a new profile in your Slicer, if you already have it then you should have no problem printing at the recommended speeds.
Now, if you want to have a little more peace of mind when printing, you can make a temperature tower. With that you can know what is the best temperature to print at those speeds.
With the other settings you shouldn't have any problems. Likewise, I always recommend doing a test like Benchy 3D or the elephant in this publication.
Thank you for your visit, I hope you have much success with your projects!