How to configure OrcaSlicer for your Ender 3 step-by-step (and any 3D printer)

This site is supported by its readers, and we may receive commissions if you purchase products through our links, at no additional cost to you. More information..
If you have a Ender 3 and you want to take advantage of OrcaSlicer, you will be pleased to know that this software already includes preconfigured profiles for most of the models of Creality, including the Ender 3, Ender 3 Pro, Ender 3 V2 and several of its variants.
In this guide you will see how to set it up correctly, adjust the basic parameters and get it ready to print accurately from the first try.
Step 1: Check if your Ender 3 already has an available profile
When you open OrcaSlicer for the first time, you will find an initial configuration wizard.
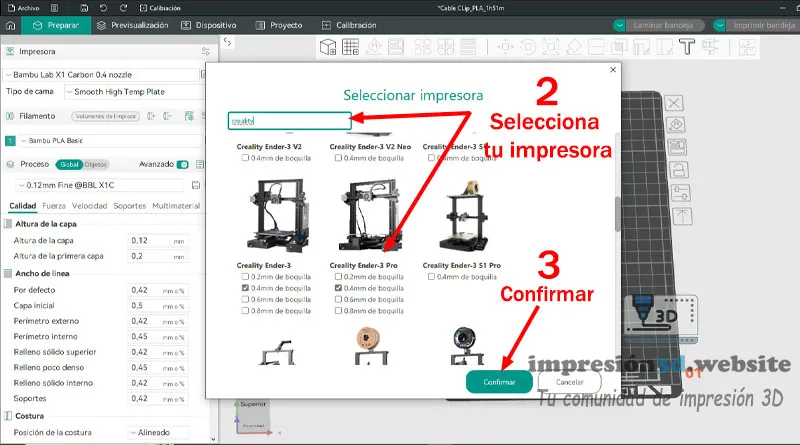
- In the Manufacturer, select Creality.
- Within the list of models, look for Ender 3, Ender 3 Pro, Ender 3 V2 or the version closest to your printer.
- If your exact model is not listed, choose a similar one (e.g. Ender 3 V2) - you will be able to adjust the parameters later.
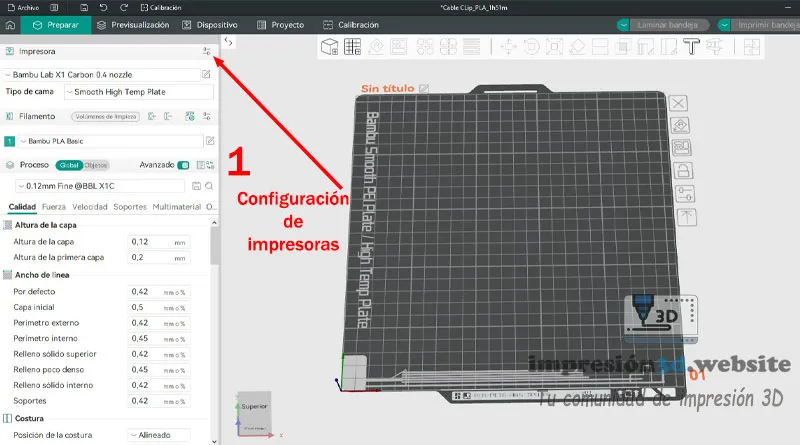
Tip: If you have already gone through the wizard, you can add a new printer at any time from the Printer Configuration > select printer.
Step 2: Loading the preconfigured profile
Once the model is selected, OrcaSlicer will automatically load the basic parameters of the machine:
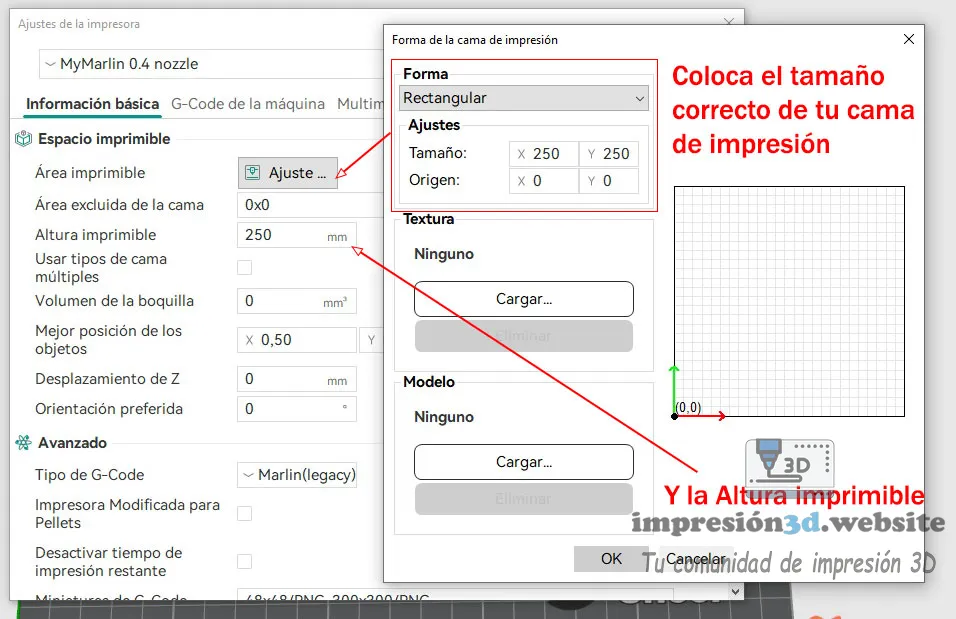
- Bed size: 220 x 220 x 250 mm
- Firmware: Marlin
- Default temperatures for PLA
- Shrinkage, speed and flow rate configured for extruder type Bowden
These values are usually adequate to start printing without complications.
Just verify that the name of your printer appears in the lower right corner, and save the profile to use it as the default.
Why is my printer not listed?
If your 3D printer is not listed in the Orcaslicer list, you can create a profile manually to add it. Read on for the next steps to follow.
Step 3: Create a manual profile (optional)
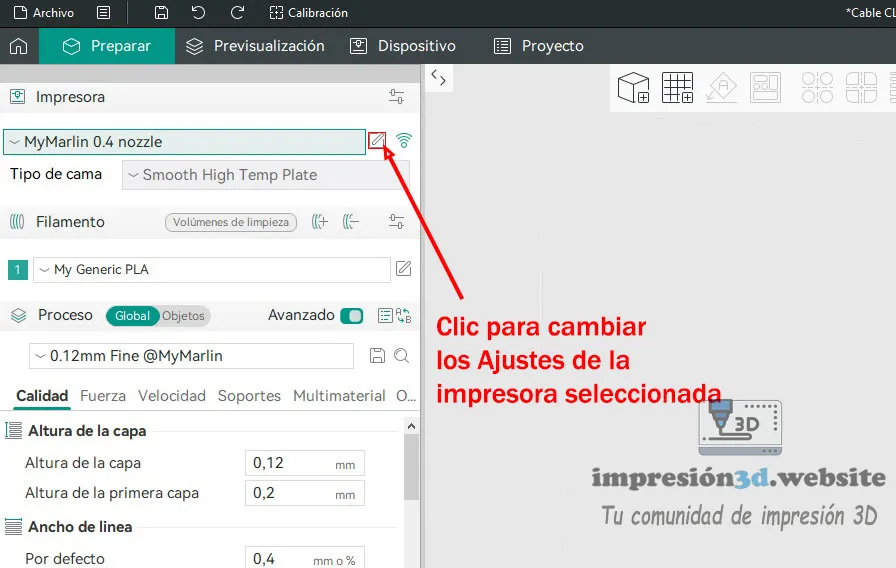
If your 3D printer is not listed in the Orcaslicer list or if your Ender 3 has modifications (for example, a direct extruder or a different hotend), you can create a manual profile from scratch.
At the top of the same menu where you select the printer, choose the firmware used by your 3D printer. For an Ender 3, select «Marlin.»

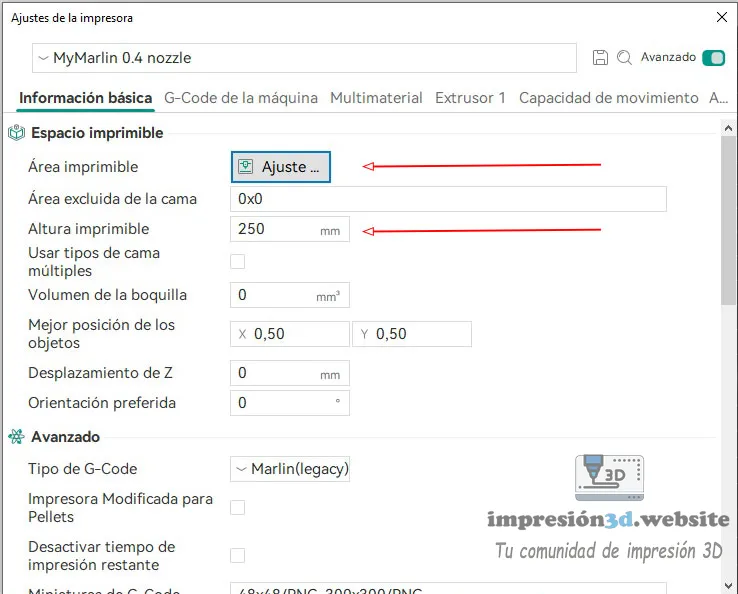
Basic printer configuration (For Ender 3)
- Bed size: 220x220x250 mm
- Firmware: Marlin
- Origin in the center: Deactivated
- G-code flavor: Marlin
Recommended initial G-code (For Ender 3)
; Ender 3 Custom Start G-code
G92 E0 ; Reset Extruder
G28 ; Home all axes
G1 Z2.0 F3000 ; Move Z Axis up little to prevent scratching of Heat Bed
G1 X0.1 Y20 Z0.3 F5000.0 ; Move to start position
G1 X0.1 Y200.0 Z0.3 F1500.0 E15 ; Draw the first line
G1 X0.4 Y200.0 Z0.3 F5000.0 ; Move to side a little
G1 X0.4 Y20 Z0.3 F1500.0 E30 ; Draw the second line
G92 E0 ; Reset Extruder
G1 Z2.0 F3000 ; Move Z Axis up little to prevent scratching of Heat Bed
G1 X5 Y20 Z0.3 F5000.0 ; Move over to prevent blob squish
Recommended final G-code
G91 ;Relative positioning
G1 E-2 F2700 ;Retract a bit
G1 E-2 Z0.2 F2400 ;Retract and raise Z
G1 X5 Y5 F3000 ;Wipe out
G1 Z10 ;Raise Z more
G90 ;Absolute positioning

G1 X0 Y{machine_depth} ;Present print
M106 S0 ;Turn-off fan
M104 S0 ;Turn-off hotend
M140 S0 ;Turn-off bed

M84 X Y E ;Disable all steppers but Z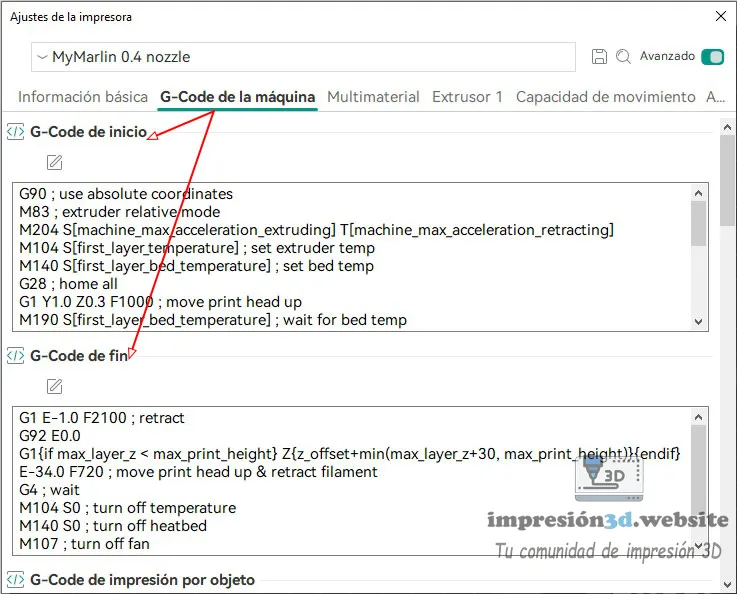
With these codes your printer will Homing correctly, purge the filament at the start and turn off the heaters at the end.
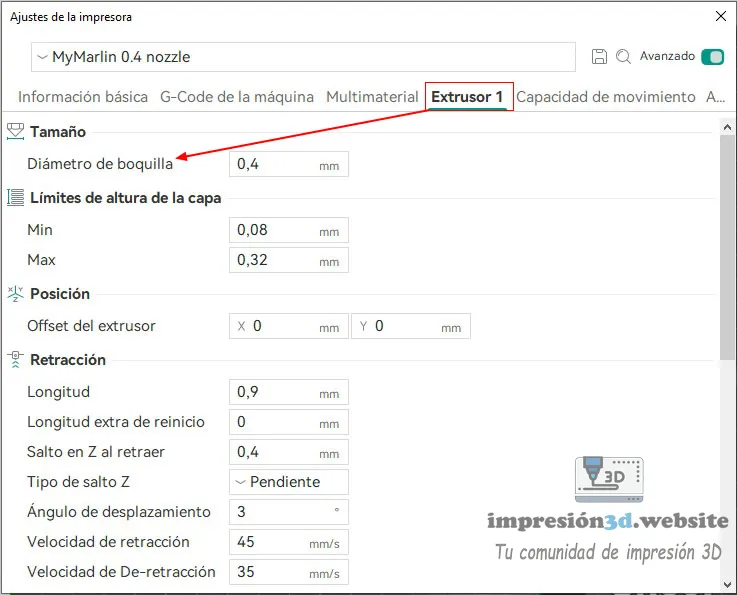
Set the nozzle size
If your printer has a different nozzle size, you can change it in the same window by clicking the «Extruder 1» tab»
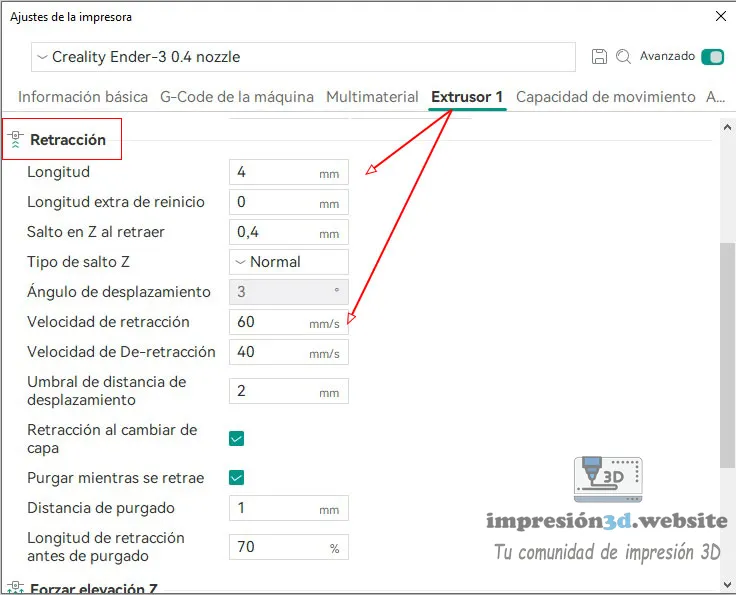
Step 4: Adjust shrinkage, flow and speed
These three parameters determine the final quality of the piece:
- Retraction: 4.5 mm at 40 mm/s (for Bowden). If you have a direct extruder, go down to 1 mm.
- Flow: keep 100% until a specific calibration is done.
- Speed: 50 mm/s is a safe starting point for the Ender 3.
Step 5: Test the profile
Export a simple model (such as a calibration cube) and save it to the SD card.
Before printing, check that:
- The nozzle and bed reach the set temperature.
- No homing errors or movement outside the printing area.
With just a few steps, you can have OrcaSlicer perfectly configured for your Ender 3, The program can also be used to create the profiles already included in the program and to make the necessary fine adjustments for your machine.
Set up OrcaSlicer for your Ender 3 is much simpler than it looks. With just a few minutes of tweaking, you can achieve results as accurate as with Cura or PrusaSlicer, taking advantage of OrcaSlicer's advanced features.
By following the steps in this guide, you will achieve an optimized, stable and 100 % profile compatible with your Creality printer.
💬 Have you already tested OrcaSlicer with your Ender 3?
Tell us about your experience in the comments, share this article with other users or sign up at 3dprinting.website for more practical guides and ready-to-use configurations.


Responses