How to print a QR code in 3D
To 3D print a QR code you need to use an online application such as Autodesk's Tinkercad.
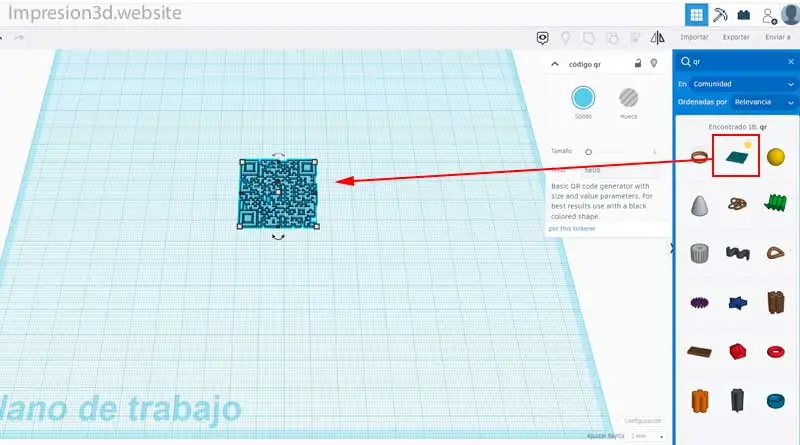
In the basic shapes menu, select the «shape generators» option. In the search bar on the right, type «QR,» then select the QR shape and place it on the workplane. Edit the 3D QR code data with your own information, and then export the STL file to your computer..
Uses of a QR code
QR codes have multiple uses today, such as:
- Make or accept payments online.
- Attract customers to your website.
- Using virtual menus in restaurants.
- Authenticate purchases made online, such as movie tickets for example.
And there are many uses that are practical and fast and easily solve access to information by simply scanning a code. (If you want to know what QR codes are and what they are used for, I leave you an external link Here.)
QR codes are usually printed on paper, but paper can be torn or lost.
If you have a 3D printer you can print a 3D QR code and make it more durable.
Why print a QR code in 3D
Because you can differentiate yourself from others by doing something different and fun..
With a 3D printer you can do:
- Keychains with a 3D printed QR to promote your website
- A business card
- Save Wifi passwords
- Save important passwords that you don't want to lose
And because it also gives a more professional appearance.
How to print a QR code in 3D
Log in to Tinkercad using your account, if you don't have one you can login with your Google account. Tinkercad is free.
You can see how I do it with images from this post: How to make keychains with names in 3D
Let's see a step by step from Tinkercad:
How to make a QR code in Tinkercad
1. From the workspace, go to the «Basic Shapes» menu and click to display the options.
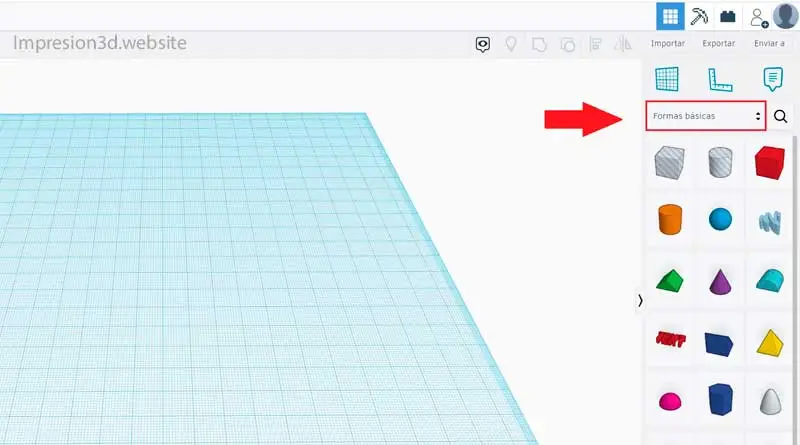
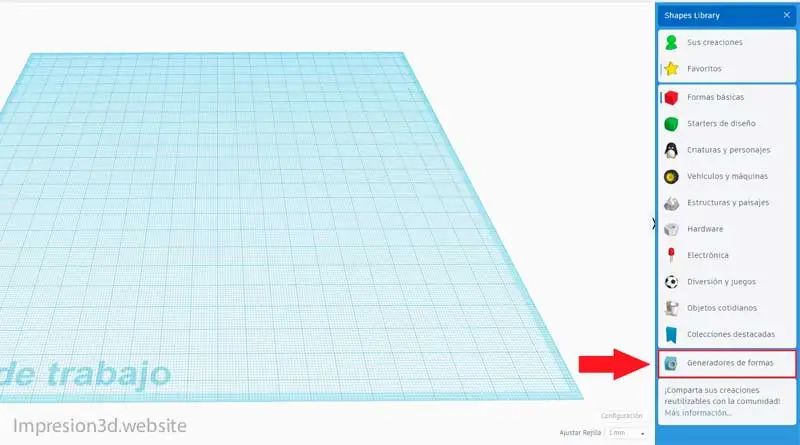
2. In the window that appears, select the «Shape Generators» option»
3. Now click the magnifying glass on the right and type «QR»

4. In this window several options will appear, you have to Click on the QR code.
Now click on the work plan again and you will see the QR code appear.
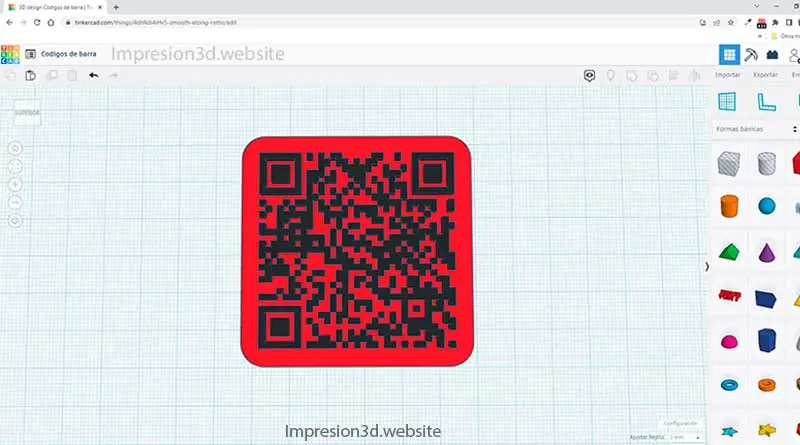
5. Now is the time to configure the QR code with the text you want to promote, it can be a link to a web page or it can be a password or any informative data that you consider important.
In my case I will put the address of my website: presion3d.website
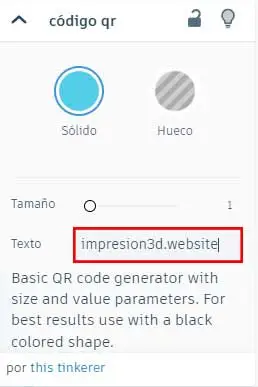
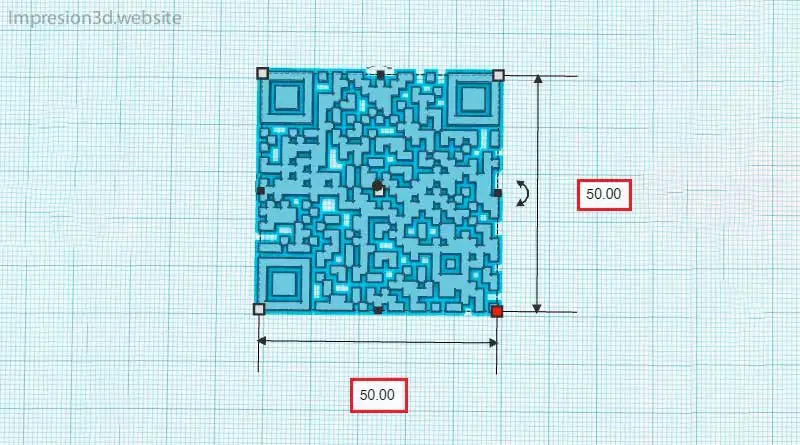
6. At this point you are going to enter the width and height measurements for the code. In my case I am going to enter measurements of 50 x 50 mm by 2 mm high.
To change the size just click on the QR code and then on any of the 5 white squares.
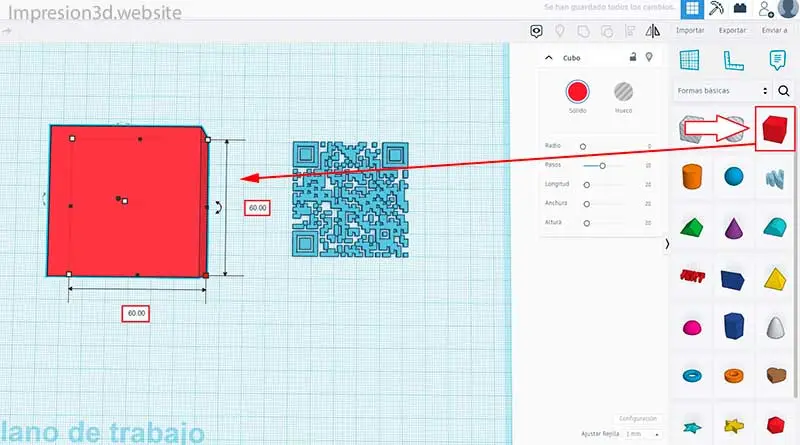
7. Now that you have the QR code, you need a background. To do that, go back to the «Basic forms»just as it was at the beginning.".
Click on the «cube» shape and then on the work surface.
8. Once you have the Cube on the work surface, you will modify its measurements so that it is a little larger than the QR code.
In my case for the example I am going to put 60 x 60 mm width.
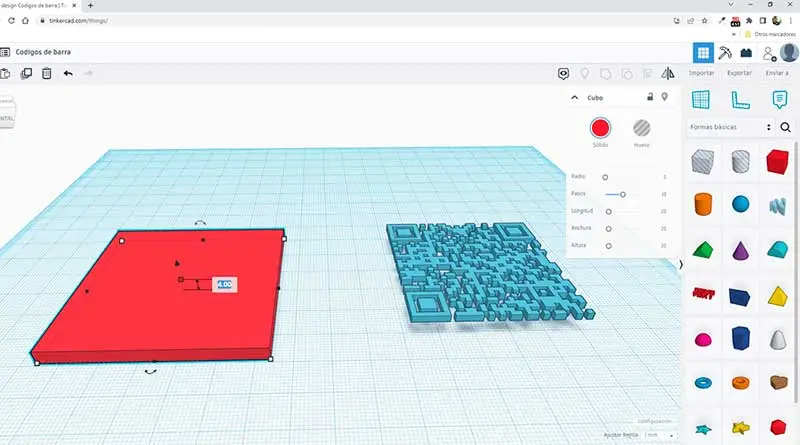
8. In the height I am going to put about 4 mm so that the base has rigidity.
now i will do Click on the QR code and then I'm going to raise it from the work surface about 4 mm, which is the same height as the base.
To do this you need Click on the black triangle and go up to 4 mm without releasing the mouse button.
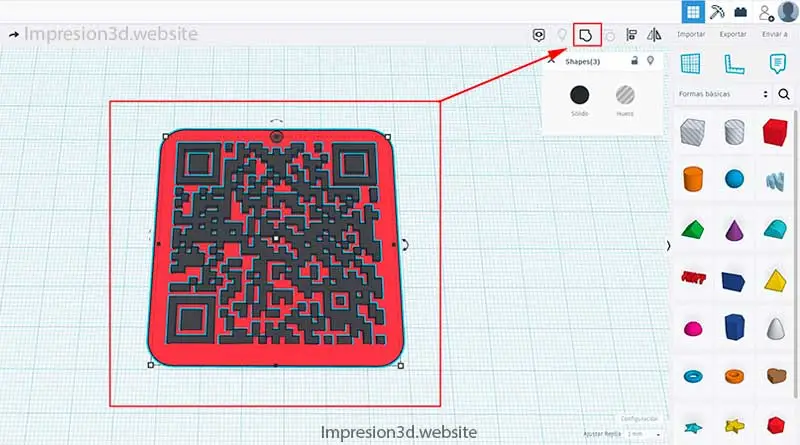
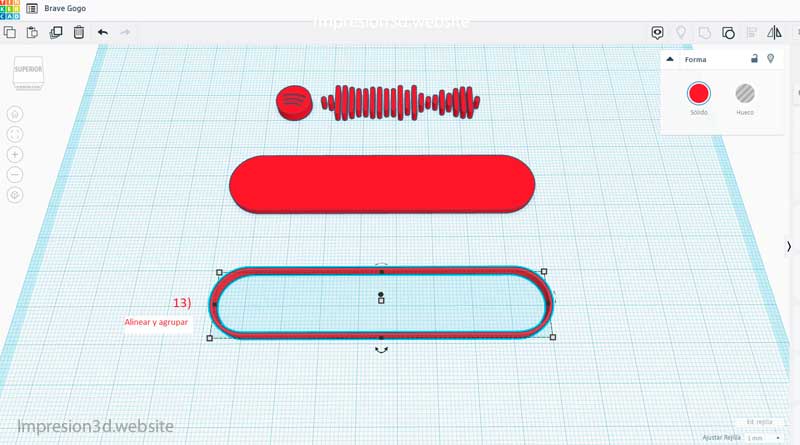
9. Once you’ve completed the previous step, select all the elements and use the «Align» tool located at the top right, as shown in the image.
After the black points are marked, you are going to click on the centers as seen in the image.
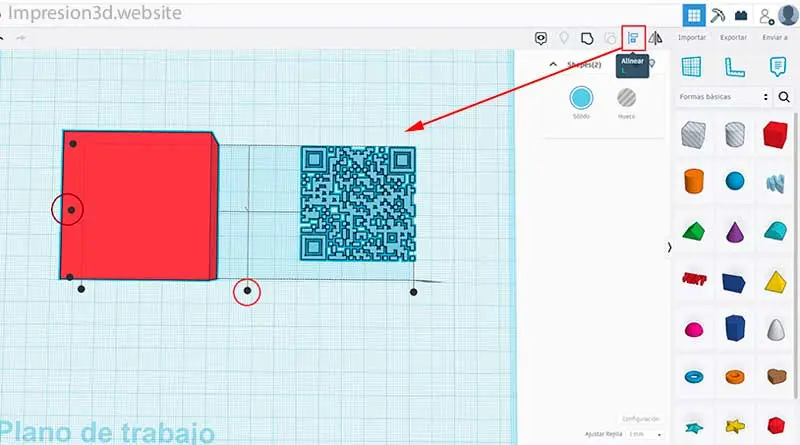
10. If everything went well, you will see that the QR code and the base have been aligned in their centers.
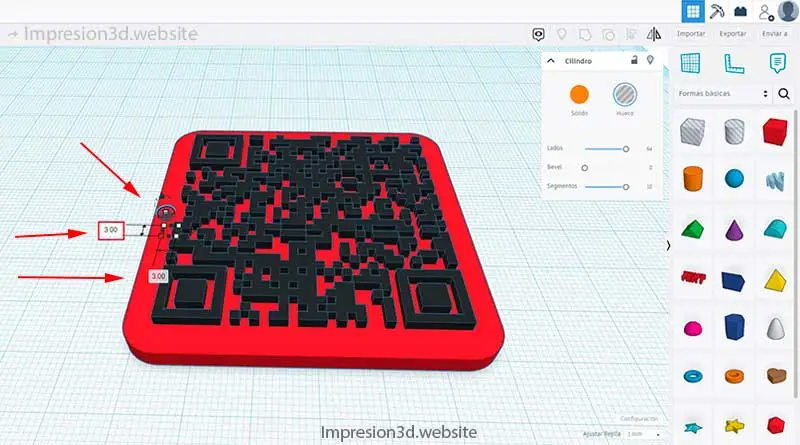
11. Now you need to make the hole for the keyring. To do this, select the transparent cylinder from «Basic Shapes» and place it on the workplane, just as you did with the other objects.
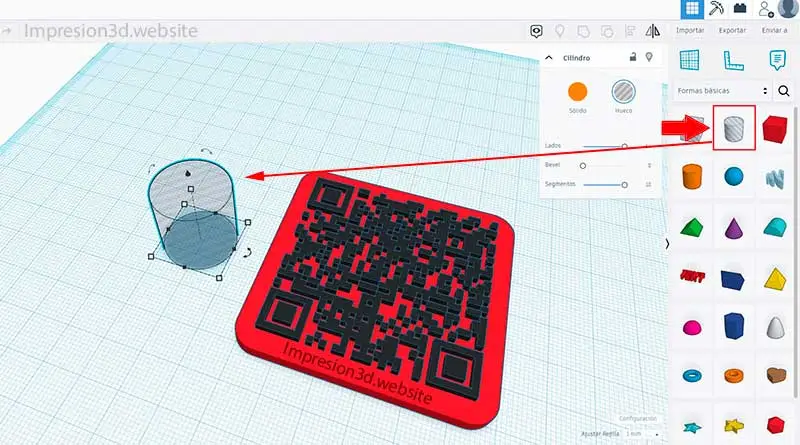
12. Modify the sides of the cylinder. Click on the white squares and choose the size, in my case I'm going to put 3 x 3 mm.
Now move the cylinder and place it where you want to put the key ring. I'm going to put it in the middle.
13. At this point, you should «Group» all the shapes so that they become a single object.
Select all, then click the «Group» tool in the upper-right corner, as shown in the image.
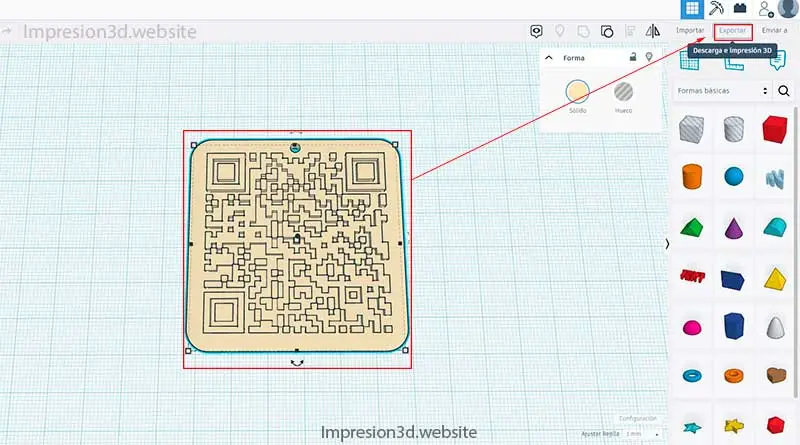
14. After you have grouped everything (and if everything is okay) you can export the STL file from Tinkercad to your hard drive.
Select all and click «Export» as shown in the image.
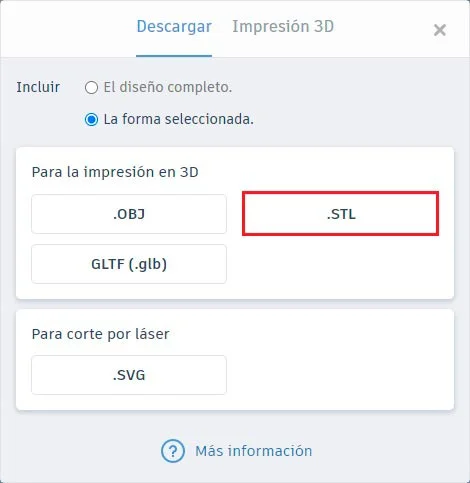
15. In the next window, select the «STL» option, which is the appropriate format for use with any slicer; in my case, Cura.
Print the QR code in 3D
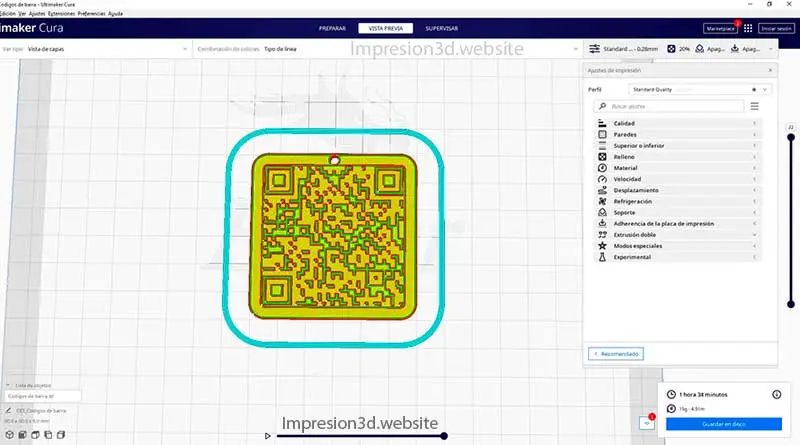
You already have your QR code in an STL file, now open it in your favorite Slicer.
Use a speed of no more than 50 mm/s, since the QR code part has to be printed well so that it can be read by the reader.
Outside of that you can use your preferred settings.
At this point you also have to choose whether to print your QR code in a white color (and then paint over the code part with a black marker); or if you are going to print using two colors.
If you have a 3D printer with multiple extrusions it shouldn't be a problem, but if you want to print multiple colors with a single extruder then you will have to create one «secquency of commands« in Cura to pause the print at the moment when the filament needs to be changed.
I invite you to see the Post: How to print in two colors with a single extruder an item that can help you print multiple colors with a single extruder.
In my case I will use two filaments of different colors, so I'm going to create a script so that the ender 3 printer stops on the last layer of the base, so I can change the filament to a black one for the QR code part.
Channel video: EliasD
I like the video on the EliasD channel because I think it explains it pretty well.
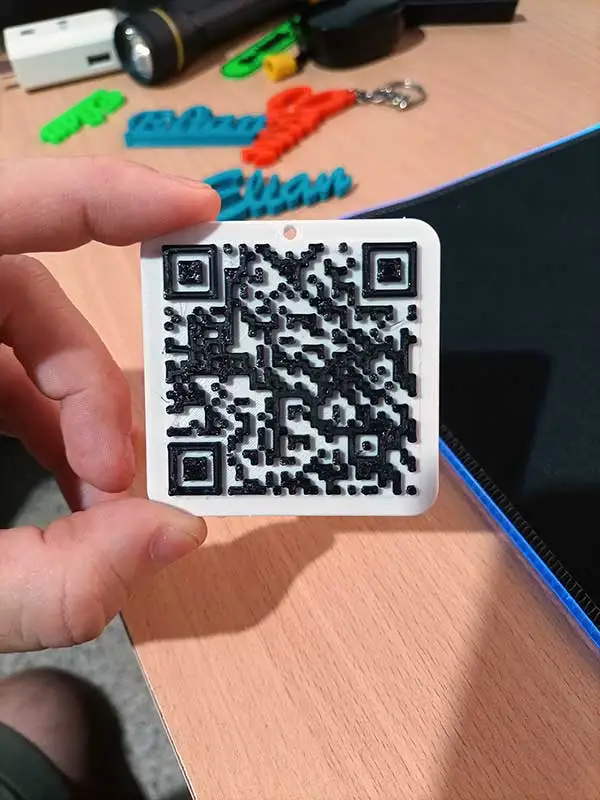
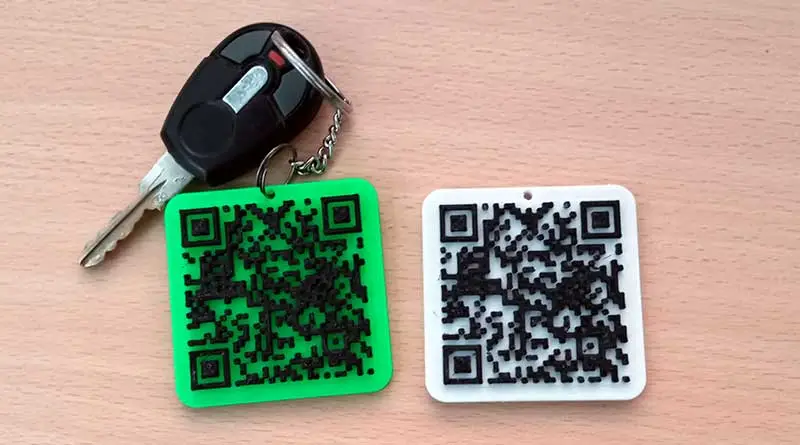
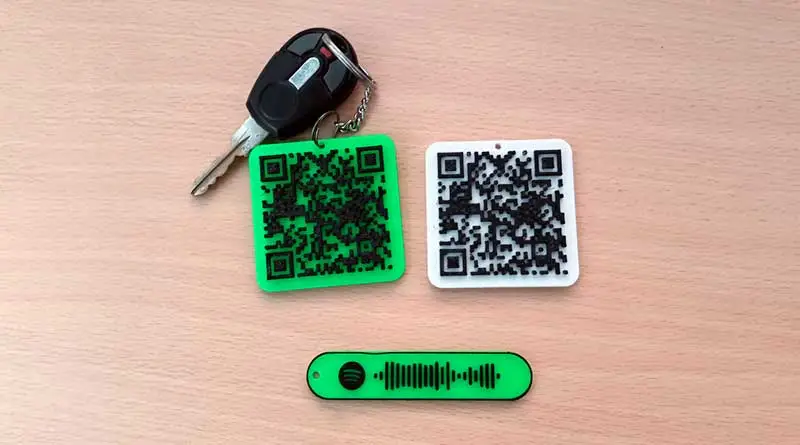
I leave you some images, I hope you liked today's post.
Thank you for your visit.
Do not forget to subscribe and share on social networks.


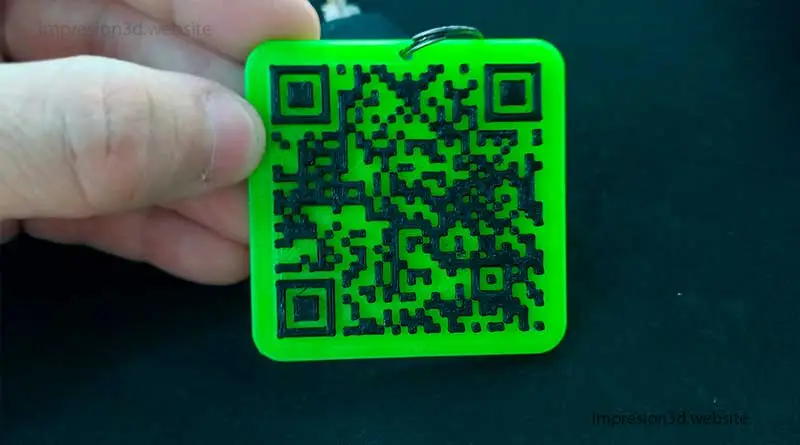
You don't read that with a camera or fart...
In fact, if you point a reader at the black and white code on the screen if it reads it to you, I even have the green one as a key ring since I published it and it also scans perfectly.
The only problem is that it cannot be made smaller without having to change the mouthpiece. For my taste, that size is too big to be used as a key ring.
And to make it smaller, I would have to use a 2.5mm nozzle, which would take a little longer to print. But that already depends on each one and what you need to do.
Is it printed with 0.4mm nozzle?
With 0.4mm line width?
Hello! Yes, with a 0.4 nozzle because with a larger nozzle it becomes more complicated to print in that size.
To 3D print a smaller Qr you would have to use a smaller nozzle.