What is Z-hop, and When to Use It?
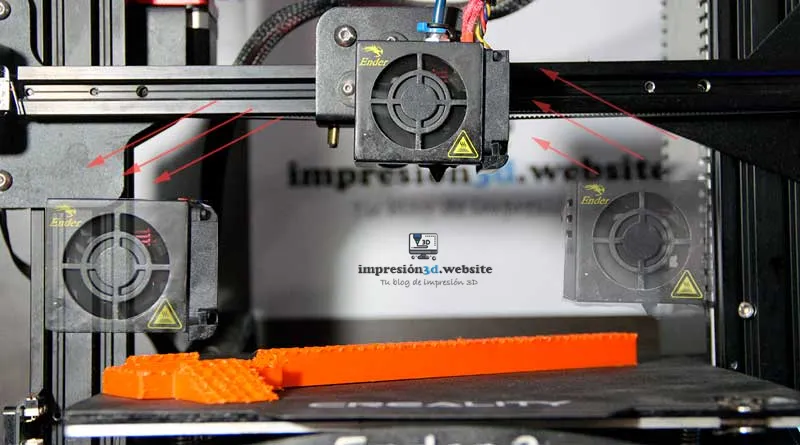
Z-jump is a setting in the offset settings that allows the nozzle to be lifted off the print surface to avoid collisions with parts that are being printed or have already been printed on the build bed.
When the nozzle moves from one position to another, it can drag filament and collide with printed parts, which can displace or damage them.
With this setting enabled, the nozzle is raised a small distance before moving to the next position, reducing the chance of collisions.
How to activate Z-jump
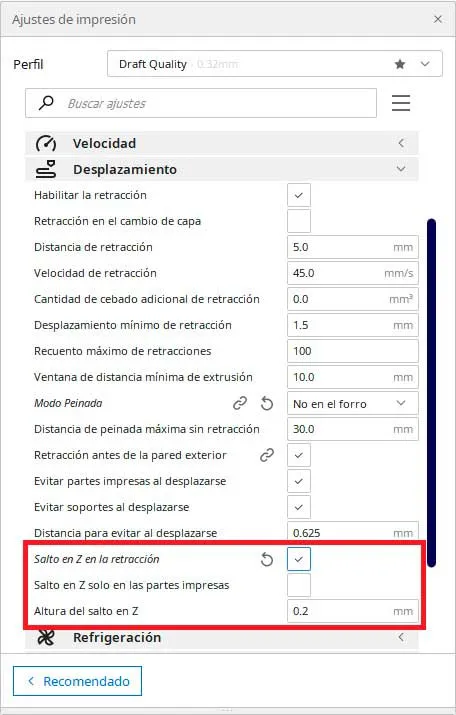
To activate the jump in Z you must enter the cutting software, for example in treatment You should look for the settings in the «Displacement» and select the «Z-jump on retraction«.
height can be set in millimeters that the nozzle should be raised and (from the speed tab) the speed at which you should do it.
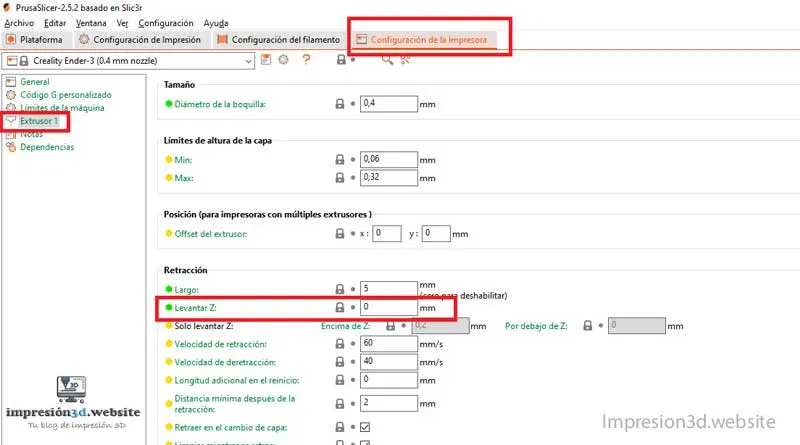
The settings may also vary depending on the slicing software you use. For example, to activate Z-jump in PrusaSlicer you should go to «Printer Setup» and under the «extruder 1» Find and change the setting «lift Z«
When to use the Z-Jump
Usage depends on the type of print and the geometry of the part. For example, if the part has many small details with supports, It is recommended to avoid collisions. If the piece is large and has few details, it is not necessary because may increase printing times.
It can also be used as a technique to print multiple colors on the first layer with a single extruder. With this technique, the different colours of a model are printed in parts and the Z-jump is used so that the parts already printed in other colours do not collide.
I will make a post later talking about this technique, for now I will leave you a video below.
Youtube video: blito 3D
What effect does it have on 3D printing?
The effect of Z-jumping in 3D printing is a reduction in collisions and damage to printed parts.
However, it can also have a negative effect on print quality as the nozzle can lose precision as it lifts and moves back to the print surface. Additionally, Its use may increase the total printing time.
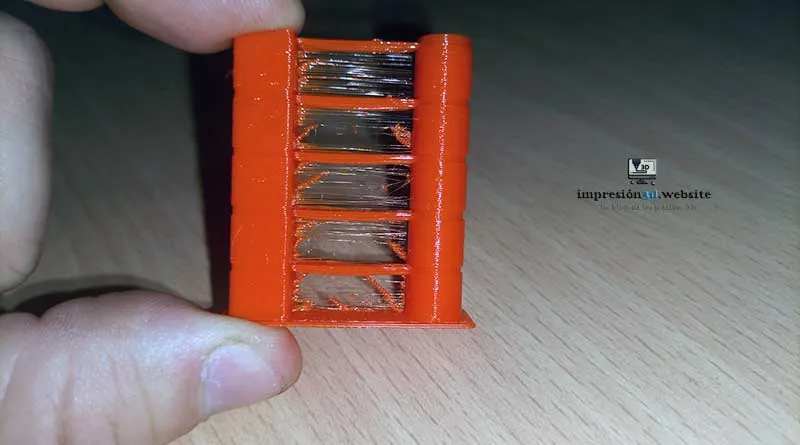
Another unwanted effect is that can generate threads in prints if you do not have absolute control of the retractions.
If you want to know more about threads in 3D printing and how to avoid them, here I leave you a post that may interest you.
Set Z break
The Z-jump setting depends on the type of 3D printer and the slicing software used. In general, It is recommended to set a lifting distance between 0.1 and 0.3 mm and a lifting speed between 10 and 30 mm/s
What precautions should be taken?
It's important to put attention on Z-jump can increase printing time and in some cases may affect print quality.
You need to make sure that the nozzle does not rise too high and that the lift speed is suitable for printing.
It is also important perform tests retraction before final printing to find the optimal settings for each part.
Conclusion
Z-jump is a feature that helps prevent collisions and damage to printed parts. Its use depends on the type of print and the geometry of the part.
When setting it up it is important to take into account the lifting distance and lifting speed, and perform tests before final printing for best results.
I wouldn't recommend using it all the time, only on occasions when it is really necessary., since it can lengthen printing times (considerably) and also, if you do not have good management of the retractions, Z-jump may generate strings during printing.
Frequent questions
- Can I enable Z-jump on any 3D printer? Most modern printers have this feature in the cutting software.
- Can I enable Z-jump on any type of printed part? It depends on the type of print and the geometry of the part. On some large parts with few details it may not be necessary.
- What effect does Z-jump have on print time? Using Z-jump can increase print time due to the nozzle lifting before moving to the next position.
- How can I find the optimal settings on my 3D printer? It is important to test before final printing to find the optimal settings for each part. You can adjust the lift-off distance to get the best results.


Can the Z-jump be applied to a specific number of layers? For example, in my color prints with a single extruder, I only need the Z-jump on the first two layers; after that, I’d like to disable it. However, I don’t think that option exists, and it would be great if they added it in a future update. I seem to recall that enabling the »Z-jump on already printed parts» option doesn’t give me the desired effect. I use Cura as my slicer. Thanks